<?xml version="1.0" encoding="utf-8"?>
<feed xmlns="http://www.w3.org/2005/Atom">

  <title><![CDATA[unstdio.org]]></title>
  <link href="http://www.unstdio.org/atom.xml" rel="self"/>
  <link href="http://www.unstdio.org/"/>
  <updated>2012-08-08T21:37:44-07:00</updated>
  <id>http://www.unstdio.org/</id>
  <author>
    <name><![CDATA[C4]]></name>
    
  </author>
  <generator uri="http://octopress.org/">Octopress</generator>

  
  <entry>
    <title type="html"><![CDATA[Dual Booting ChomeOS on a Macbook Air]]></title>
    <link href="http://www.unstdio.org/blog/2012/03/23/dual-booting-chomeos-on-a-macbook-air/"/>
    <updated>2012-03-23T19:28:32-07:00</updated>
    <id>http://www.unstdio.org/blog/2012/03/23/dual-booting-chomeos-on-a-macbook-air</id>
    <content type="html"><![CDATA[<p>I have been wanting to try out ChromeOS for quite a while. I worked on compiling my own version with some added hardware support a while back, but never really finished it. Lately the old Macbook Air has been having some issues with bogging down when running a lot of browser tabs. So, I started looking into ChromeOS again.</p>

<p>I saw that <a href="http://hexxeh.net/">Hexxeh</a> was able to get it running on the newer Macbook Air 3,1. I have the Macbook Air 1,1 with 1.6ghz Dual Core. His post mentioned that someone tried it on an earlier version of the Macbook Air but it failed to recognize the Wifi card because of the lack of support for the broadcom drivers. His post also mentioned that nVidia’s GPU drivers don’t work very well under EFI so you will have to install to the local disk.</p>

<p>Since then <a href="http://hexxeh.net/">Hexxeh</a> has rolled out <a href="http://chromeos.hexxeh.net/lime.php">ChromeOS Lime</a> (Which is badass) it has added additional hardware support. One of the key features is the support for the broadcom wifi drivers (BCM43XX). I took a look at my Macbook Air and sure enough, it has a bcm43xx broadcom wifi card so I decided to try running Lime on it. To my surprise it worked, and worked well.</p>

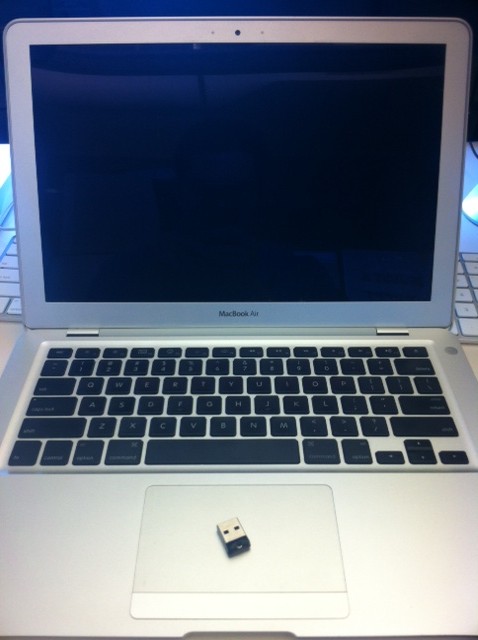
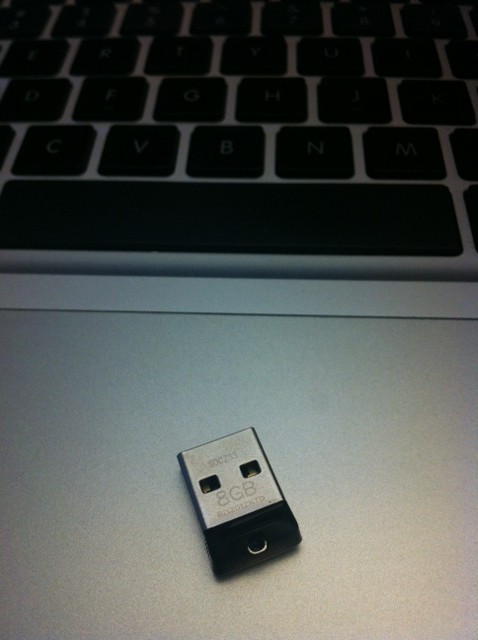
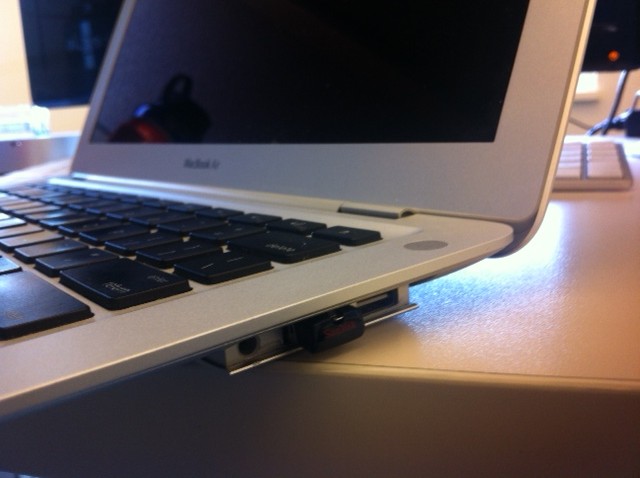
<p>First I didn’t want a huge flash drive sticking out of the side of my Macbook Air so I ordered a tiny usb flash drive from Amazon. Can’t beat 10 bucks. <a href="http://www.amazon.com/SanDisk-Cruzer-Flash-Drive-SDCZ33-008G-B35/dp/B005XVC4VE/ref=sr_1_1?s=electronics&amp;ie=UTF8&amp;qid=1332528427&amp;sr=1-1">http://www.amazon.com/SanDisk-Cruzer-Flash-Drive-SDCZ33-008G-B35/dp/B005XVC4VE/ref=sr_1_1?s=electronics&amp;ie=UTF8&amp;qid=1332528427&amp;sr=1-1</a></p>

<p>Once that came in, I installed the latest version of Lime 3/22/2012 using the super easy chrome install tool. This took about 10 minutes.</p>

<p><a href="http://unstdio.org/images/2012/03/image-e1332529947456.jpeg"><img src="http://unstdio.org/images/2012/03/image-e1332529947456.jpeg" alt="" /></a></p>

<p><a href="http://unstdio.org/images/2012/03/image-1-e1332530064172.jpeg"><img src="http://unstdio.org/images/2012/03/image-1-e1332530064172.jpeg" alt="" /></a></p>

<p><a href="http://unstdio.org/images/2012/03/image-2-e1332530039600.jpeg"><img src="http://unstdio.org/images/2012/03/image-2-e1332530039600.jpeg" alt="" /></a></p>

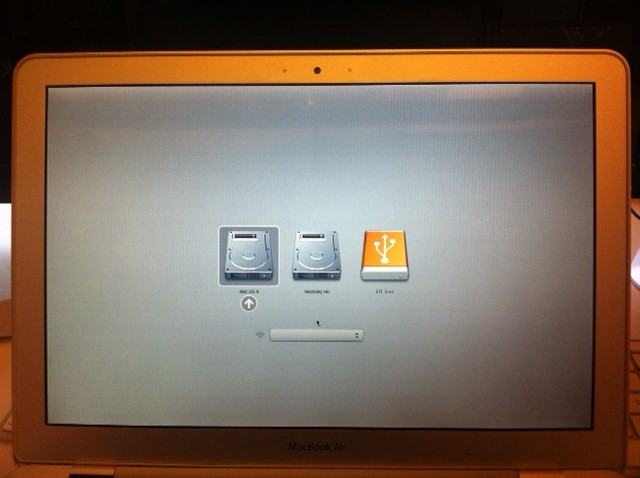
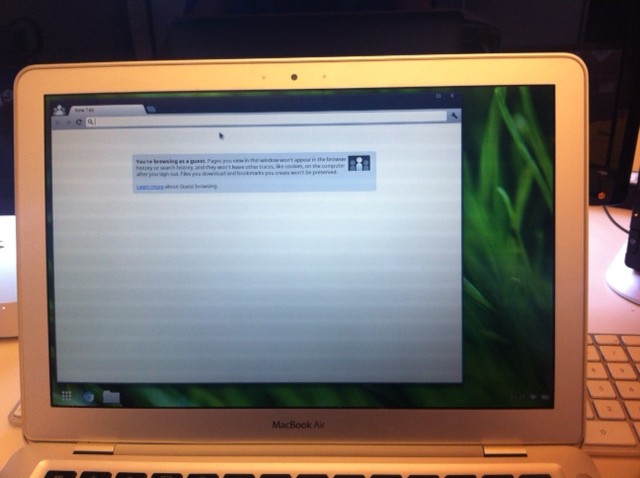
<p>I booted it up holding down the “option” key until I saw my disk choices to boot from. One thing I did was I checked if I was able to connect to the wifi from here.</p>

<p><a href="http://unstdio.org/images/2012/03/image-3-e1332530017660.jpeg"><img src="http://unstdio.org/images/2012/03/image-3-e1332530017660.jpeg" alt="" /></a></p>

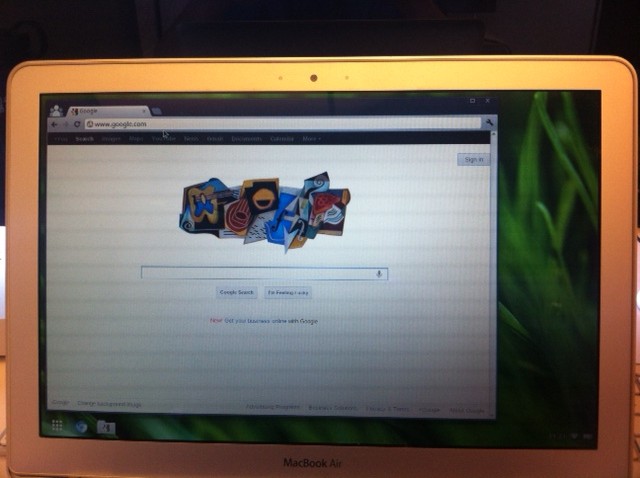
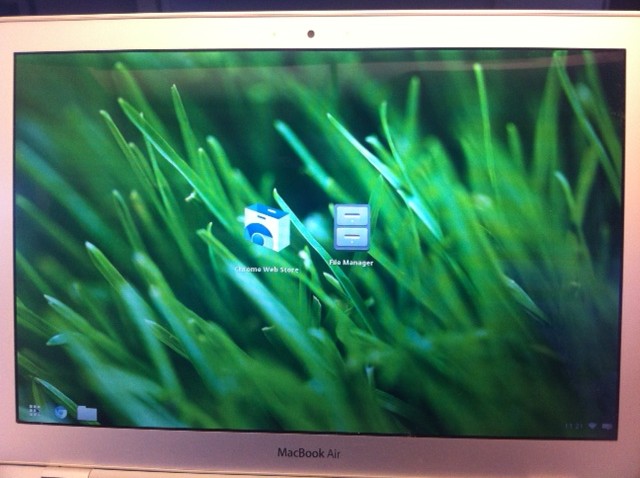
<p>Once I was connect to the AP, I then proceeded to boot off of the USB Drive. Like it said in his post it takes 20-25 to get to a login screen, which isn’t all that bad. Once you get the login screen you are good to start “Chroming?”.</p>

<p><a href="http://unstdio.org/images/2012/03/image-4-e1332530000727.jpeg"><img src="http://unstdio.org/images/2012/03/image-4-e1332530000727.jpeg" alt="" /></a></p>

<p><a href="http://unstdio.org/images/2012/03/image-6-e1332529974559.jpeg"><img src="http://unstdio.org/images/2012/03/image-6-e1332529974559.jpeg" alt="" /></a></p>

<p><a href="http://unstdio.org/images/2012/03/image-5-e1332529986194.jpeg"><img src="http://unstdio.org/images/2012/03/image-5-e1332529986194.jpeg" alt="" /></a></p>

<p>I was pretty surprised on how much of the Mac key functionality worked. Even the camera worked. The only thing that I could find that didn’t work was the keyboard illumination, which is no big deal. Also, the touchpad has it’s quirks as well.</p>

<p>The thing that I found strange when using this was the lack of Flash support. After poking around some of the chrome forums it looks like they removed the chrome driver recently, which really sucked. So now you can only watch 1/3 of youtube videos. I hope we can get the Flash back in the Lime build. (libflashplayer.so) Also when watching HTML5 videos on youtube there are weird orange pixel interference which can be very distracting.</p>

<p>All in all, this is pretty rad and hopefully this post helps some other people breathe some new life into their old Macbook Airs.</p>

<p><strong>-C4 </strong></p>
]]></content>
  </entry>
  
  <entry>
    <title type="html"><![CDATA[keg.io Development Continues...]]></title>
    <link href="http://www.unstdio.org/blog/2012/03/14/keg-io-development-continues/"/>
    <updated>2012-03-14T21:32:04-07:00</updated>
    <id>http://www.unstdio.org/blog/2012/03/14/keg-io-development-continues</id>
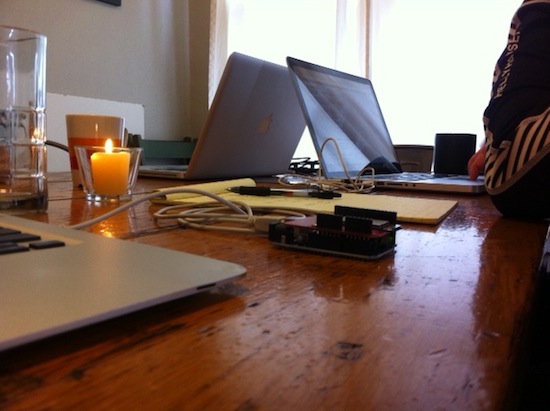
    <content type="html"><![CDATA[<p>Last weekend Chris, Dylan, Garret, and I had a mini hack-a-thon to try and bust out some more code. We were able to reliably get all the GET and PUT requests to the keg.io server in AWS working reliably. Dylan also was able to get a ton of routes done. This also included logging all of the REST api calls from the Arduino into the DB. I guess I should back up a bit and explain a bit of the architecture.</p>

<p><a href="http://unstdio.org/images/2012/03/photo-1.jpg"><img src="http://unstdio.org/images/2012/03/photo-1.jpg" alt="" /></a></p>

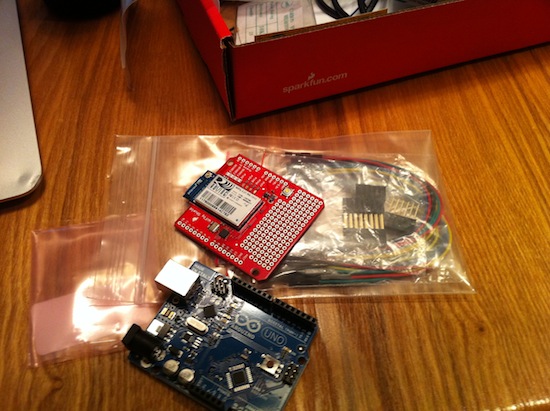
<p>Originally we had an Arduino with a custom shield that talked to a server running node.js over a usb serial connection. As you can imagine this is probably not the best communication method, plus we need to have a computer running next to the Kegerator. Now with the help of sparkfun&#8217;s wifly shield we are now going send HTTP requests over wifi. Rad. This will eliminate the computer entirely and allow us to develop and host the server in AWS. Here is a list of all the GET routes we have for the Web UI:</p>

<h3>GET</h3>

<ol>
<li><p>/hello - basic ping of the keg,io server</p></li>
<li><p>/config/socketPort - Retrieving the port to use for websocket connections</p></li>
<li><p>/kegerators/ACCESS_KEY/temperatures - Get temperatures for a kegerator</p></li>
<li><p>/kegerators/ACCESS_KEY/users - Gets users of a kegerator based on recent pours</p></li>
<li><p>/kegerators/ACCESS_KEY/pours - Get pours from a kegerator</p></li>
<li><p>/kegerators/ACCESS_KEY/kegs - Get the list of kegs used in this kegerator</p></li>
<li><p>/users - Get info about users</p></li>
<li><p>/users/RFID - Get user info</p></li>
<li><p>/users/RFID/coasters - Get users earned coasters</p></li>
<li><p>/coasters - Get info about coasters</p></li>
<li><p>/coasters/ID - Get info about coasters</p></li>
</ol>


<p>There are also a set of API routes for the Ardunio code to interact with. These are routes designed for the Kegerator to interact with the server. They include things like, Authorize a User, Get the Keg temp, and record the flow of the beer. Since each Kegerator is unique, all the requests are signed with a secret key and hashed with SHA256-HMAC to verify it&#8217;s sender. The server then sends back a hashed response with the same key for the Arduino to validate and open the Kegerator. No, you can&#8217;t replay the hash.</p>

<p><a href="http://unstdio.org/images/2012/03/photo-2.jpg"><img src="http://unstdio.org/images/2012/03/photo-2.jpg" alt="" /></a></p>

<p>There is more to come. Stay tuned.</p>

<p>-C4</p>
]]></content>
  </entry>
  
  <entry>
    <title type="html"><![CDATA[Stripe.com CTF]]></title>
    <link href="http://www.unstdio.org/blog/2012/02/25/stripe-com-ctf/"/>
    <updated>2012-02-25T18:42:24-08:00</updated>
    <id>http://www.unstdio.org/blog/2012/02/25/stripe-com-ctf</id>
    <content type="html"><![CDATA[<p><a href="http://unstdio.org/images/2012/02/Screen-Shot-2012-02-25-at-10.23.21-AM.png"><img src="http://unstdio.org/images/2012/02/Screen-Shot-2012-02-25-at-10.23.21-AM.png" alt="" /></a></p>

<p>First of all, it&#8217;s really hard for me to turn down a challenge. So when a buddy of mine sent me a link to the stripe.com CTF / war game last thursday I was pretty intrigued. Can find it here: <a href="https://stripe.com/blog/capture-the-flag">https://stripe.com/blog/capture-the-flag</a>  It&#8217;s been a couple of years since I was able to complete a decent amount of the STS IO challenge (<a href="http://io.smashthestack.org:84/">http://io.smashthestack.org:84/</a>). I always seem to underestimate how addicting these things are.</p>

<p>After a couple of hours working on it I am now on level 4. It took me a bit to get back in the groove, having to re-learn all the gdb commands. I think the thing that is the biggest time waste for me on the first couple was not looking at the obvious. I spent a bit of time trying to jump in and look for a printf() implementation vuln or something, when all you really need to do is step back and look at the obvious. I don&#8217;t want to give anything away for those who want to join in on the addicting fun. I hope to be able to finish the rest of it this weekend. Taking a quick look at 4, I think we are looking at a buffer overflow. If you haven&#8217;t already, you should give it a try. But make sure you have a couple hours to burn.</p>
]]></content>
  </entry>
  
  <entry>
    <title type="html"><![CDATA[keg.io V2 Development Begins...]]></title>
    <link href="http://www.unstdio.org/blog/2012/02/10/keg-io-v2-development-begins/"/>
    <updated>2012-02-10T02:40:44-08:00</updated>
    <id>http://www.unstdio.org/blog/2012/02/10/keg-io-v2-development-begins</id>
    <content type="html"><![CDATA[<p>Well, It&#8217;s been a little while since I&#8217;ve worked on any projects that I could put up on unstdio.org. But the wait is over! I am officially starting a new project and it&#8217;s keg.io v2. When we built the hardware for keg.io last year it was a great achievement because I&#8217;d never done anything that would be used by so many people. (Everyone at the Vivaki Nerve Center Seattle Office) But we haven&#8217;t really been able to put the time in the project that it deserves. So now we are going to do two projects at once. We got a sweet older pop machine that we also want to &#8220;technoligify&#8221;, so this will kill two birds with one stone.</p>

<p>The first couple posts of this project will be all hardware based. There is a bunch of new things to figure out since we have new ideas in mind for this. First we want to ditch the lame computer that the Arduino is connected to and move it &#8220;To the Cloud&#8221;! So we&#8217;re going wireless with the connection using <a href="http://www.sparkfun.com/products/9954">sparkfun&#8217;s wifly shield</a>. I haven&#8217;t played with this yet but <a href="http://twitter.com/crc">CRC</a> (aka &#8220;checksum&#8221;) bought a bunch of new stuff and the wifly shield was in there. The other thing we are going to do with this project is actually get real (badass) PCB&#8217;s made. We definitely need some cool branding of our own.</p>

<p><a href="http://unstdio.org/images/2012/02/photo-4.jpg"><img src="http://unstdio.org/images/2012/02/photo-4.jpg" alt="" /></a></p>

<p>So the first thing I&#8217;m going to do is get this shield soldered up and start writing some code. So stay tuned and there will be some updates in the next couple days.</p>

<p>-C4</p>
]]></content>
  </entry>
  
  <entry>
    <title type="html"><![CDATA[Friday.]]></title>
    <link href="http://www.unstdio.org/blog/2011/10/07/friday/"/>
    <updated>2011-10-07T23:02:40-07:00</updated>
    <id>http://www.unstdio.org/blog/2011/10/07/friday</id>
    <content type="html"><![CDATA[<p>What&#8217;s a Friday with out Rebecca&#8230;<a href="http://www.youtube.com/watch?v=kfVsfOSbJY0">http://www.youtube.com/watch?v=kfVsfOSbJY0</a></p>

<p>And and nice beer from keg.io</p>

<p><a href="http://unstdio.org/images/2011/10/photo-2.jpg"><img src="http://unstdio.org/images/2011/10/photo-2-742x1024.jpg" alt="" /></a></p>
]]></content>
  </entry>
  
  <entry>
    <title type="html"><![CDATA[keg.io ]]></title>
    <link href="http://www.unstdio.org/blog/2011/09/13/keg-io/"/>
    <updated>2011-09-13T17:46:35-07:00</updated>
    <id>http://www.unstdio.org/blog/2011/09/13/keg-io</id>
    <content type="html"><![CDATA[<p><a href="http://unstdio.org/images/2011/09/keg-io-logo.jpg"><img src="http://unstdio.org/images/2011/09/keg-io-logo.jpg" alt="" /></a></p>

<p>A few months ago (in March) a few guys from work and I thought it would be a great idea to get a kegerator for our office. It started out with brainstorming some pretty cool ideas. Being technology geeks we immediately decided that the kegerator needed and RFID reader to track who is drinking the keg. We did get some inspiration from the guys at yelp. (<a href="http://http://www.youtube.com/watch?v=BwVoir5HSo4">http://www.youtube.com/watch?v=BwVoir5HSo4</a>)</p>

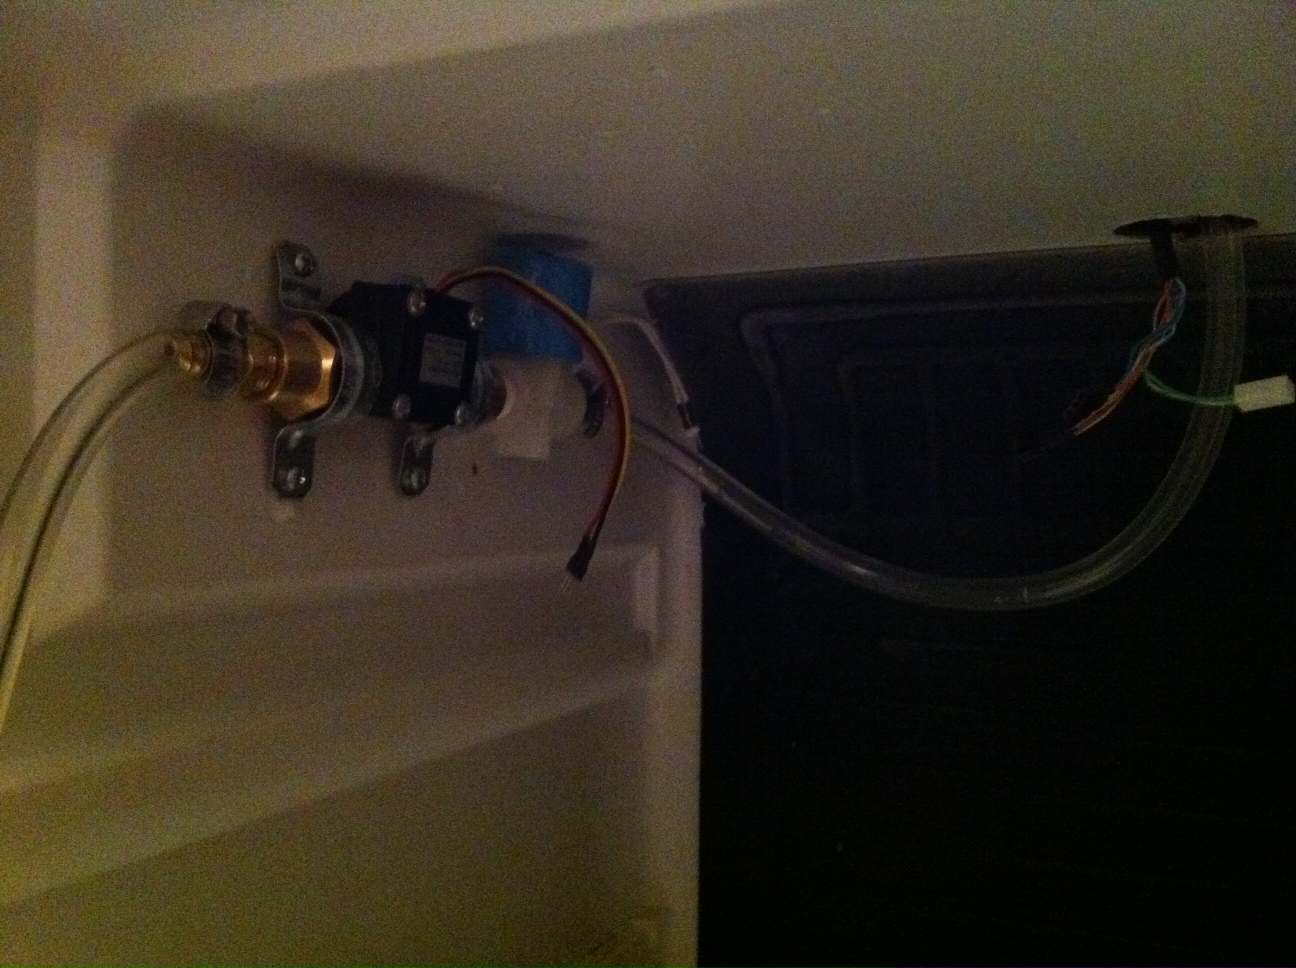
<p>After we decided on the auth method we then moved to the question “Should people be allowed to pour beer if they don’t have a card?” of course we came to an unanimous “No!” decision. So the next thing that was decided on was putting in a (closed by default) solenoid. Third, we had the issue of trying to figure out how much beer was poured and how much was left. The way we saw it there were two main ways to accomplish this. One being we could measure the weight of the keg / kegerator and calculate the difference after each pour. The other was to measure the flow going through the line during a pour. We decided on the latter. We then got a hall-effect flow sensor to measure flow. Lastly, We also wanted to know the temp of the beer / kegerator so we decided to get a temp sensor and put it in there as well.</p>

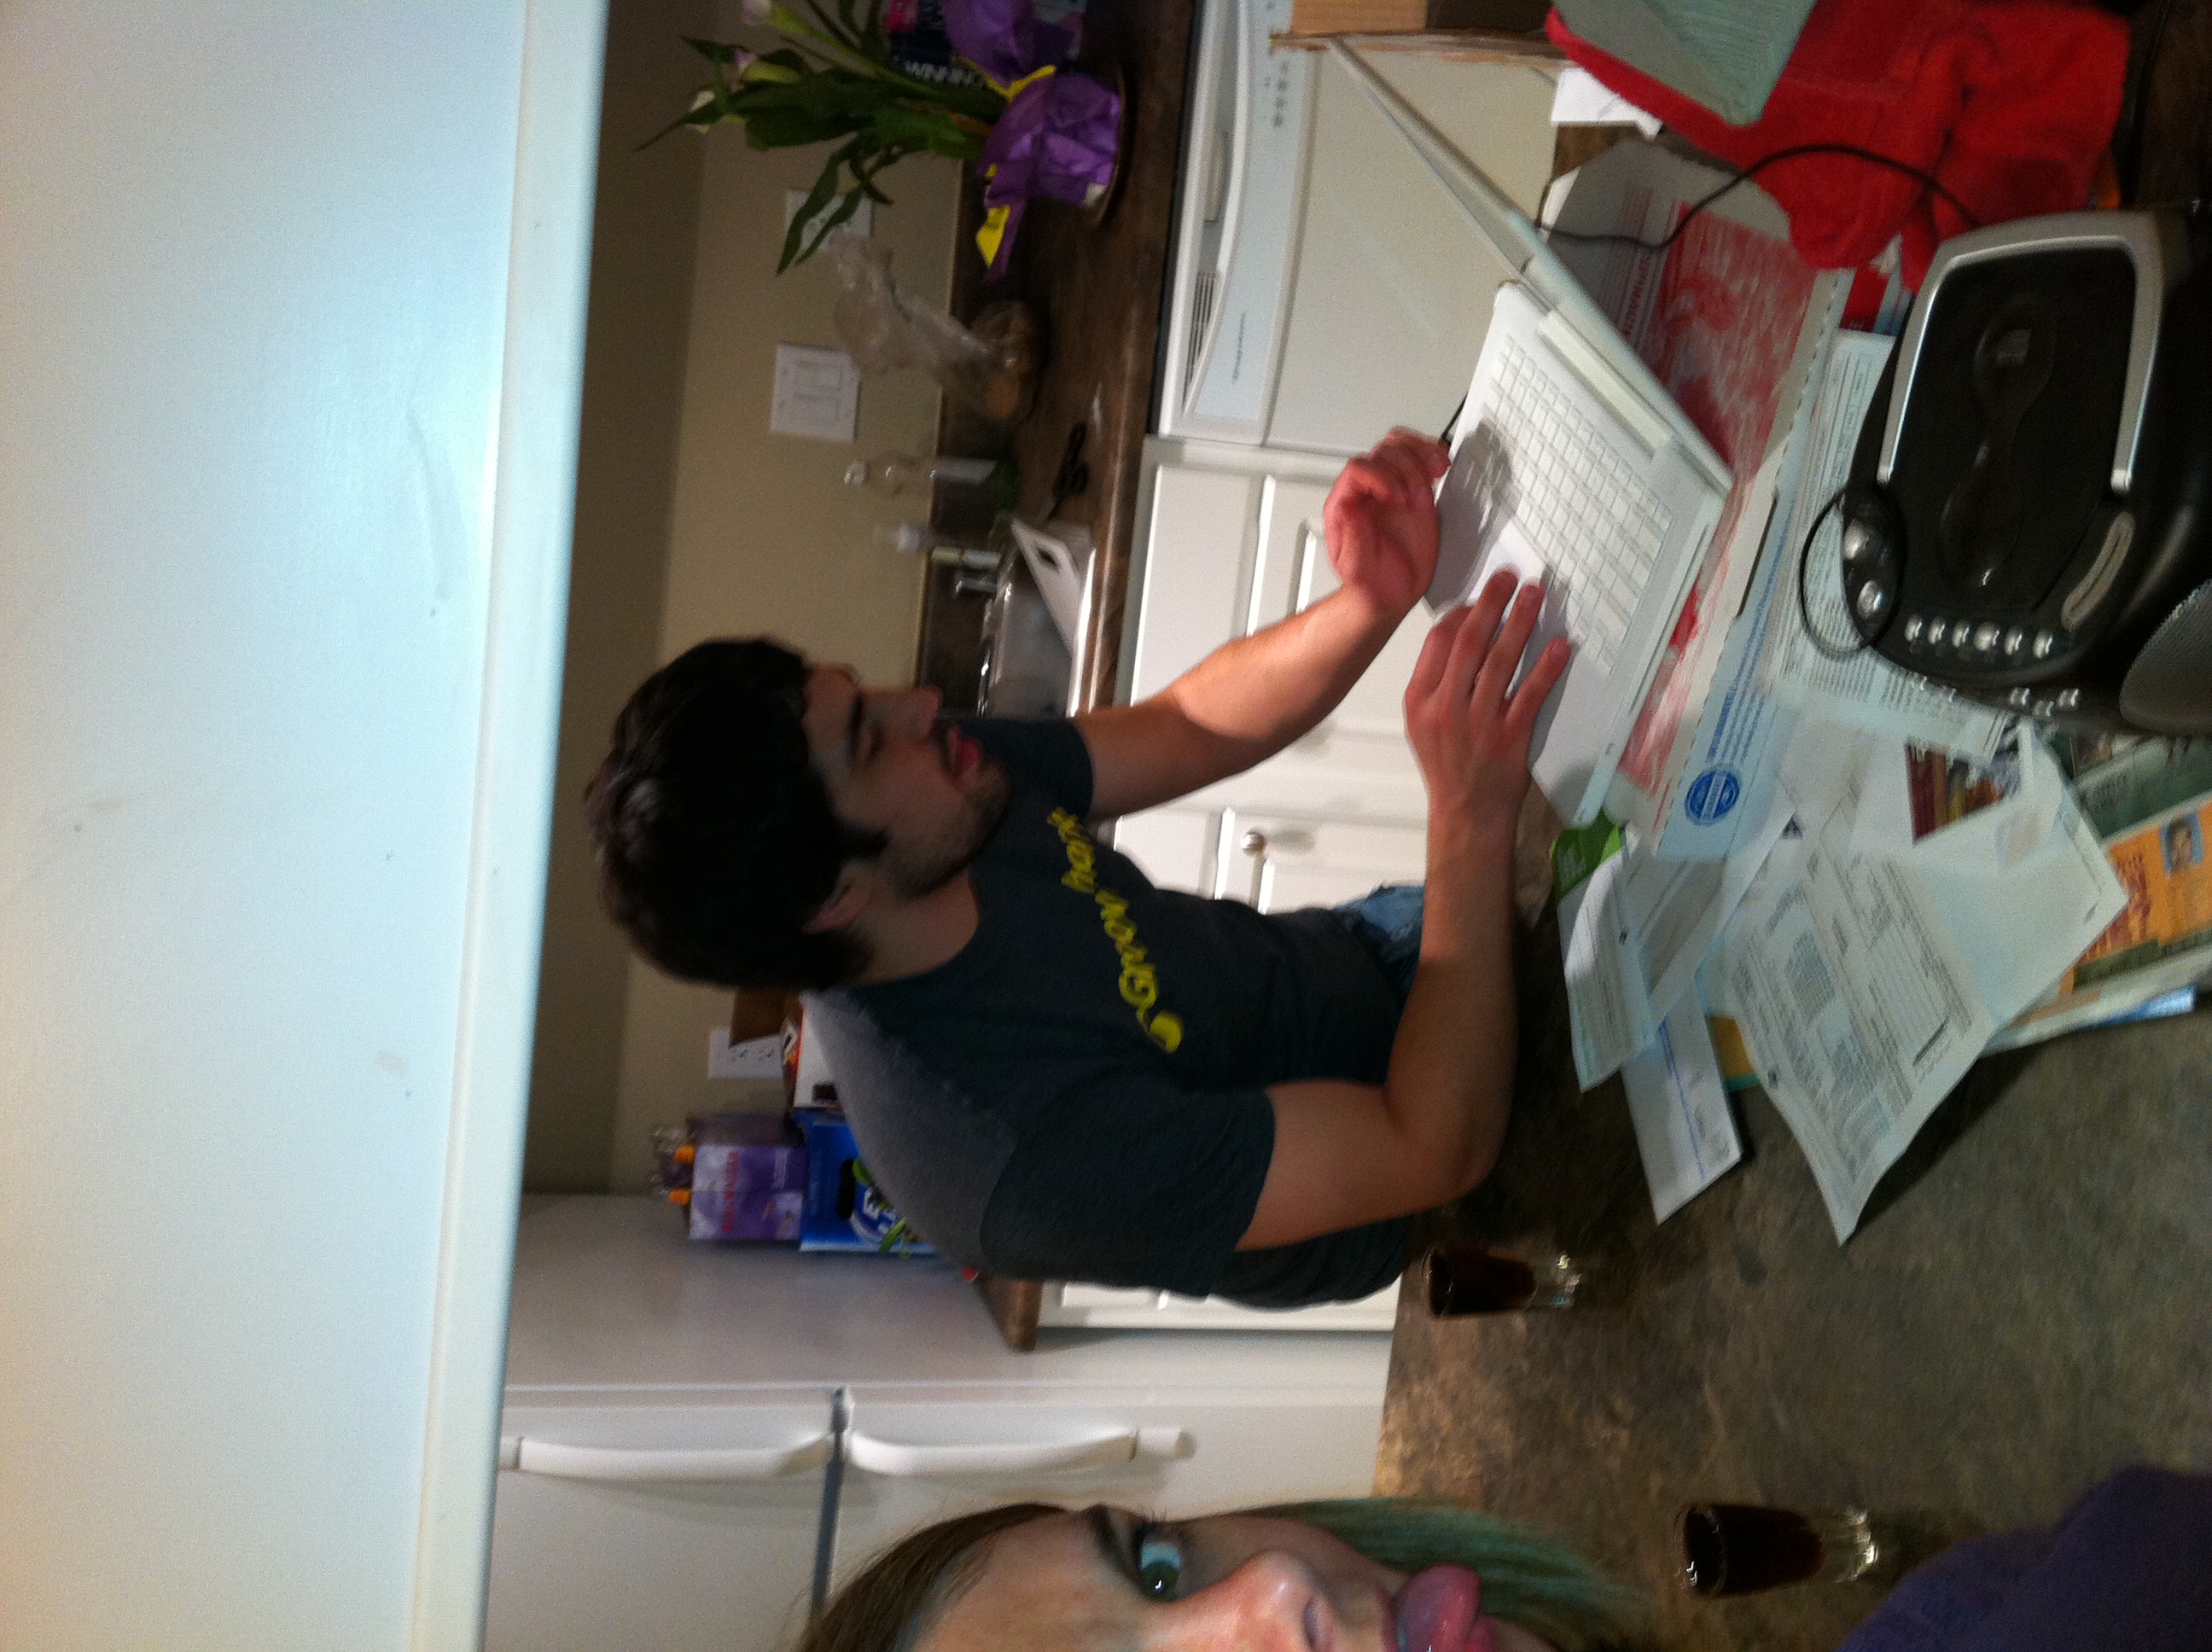
<p>Here is some coding in the kitchen. (Yeah, that&#8217;s a shot.)</p>

<p><a href="http://unstdio.org/images/2011/09/IMG_1322.jpg"><img src="http://unstdio.org/images/2011/09/IMG_1322-e1315594117648-1007x1024.jpg" alt="" /></a></p>

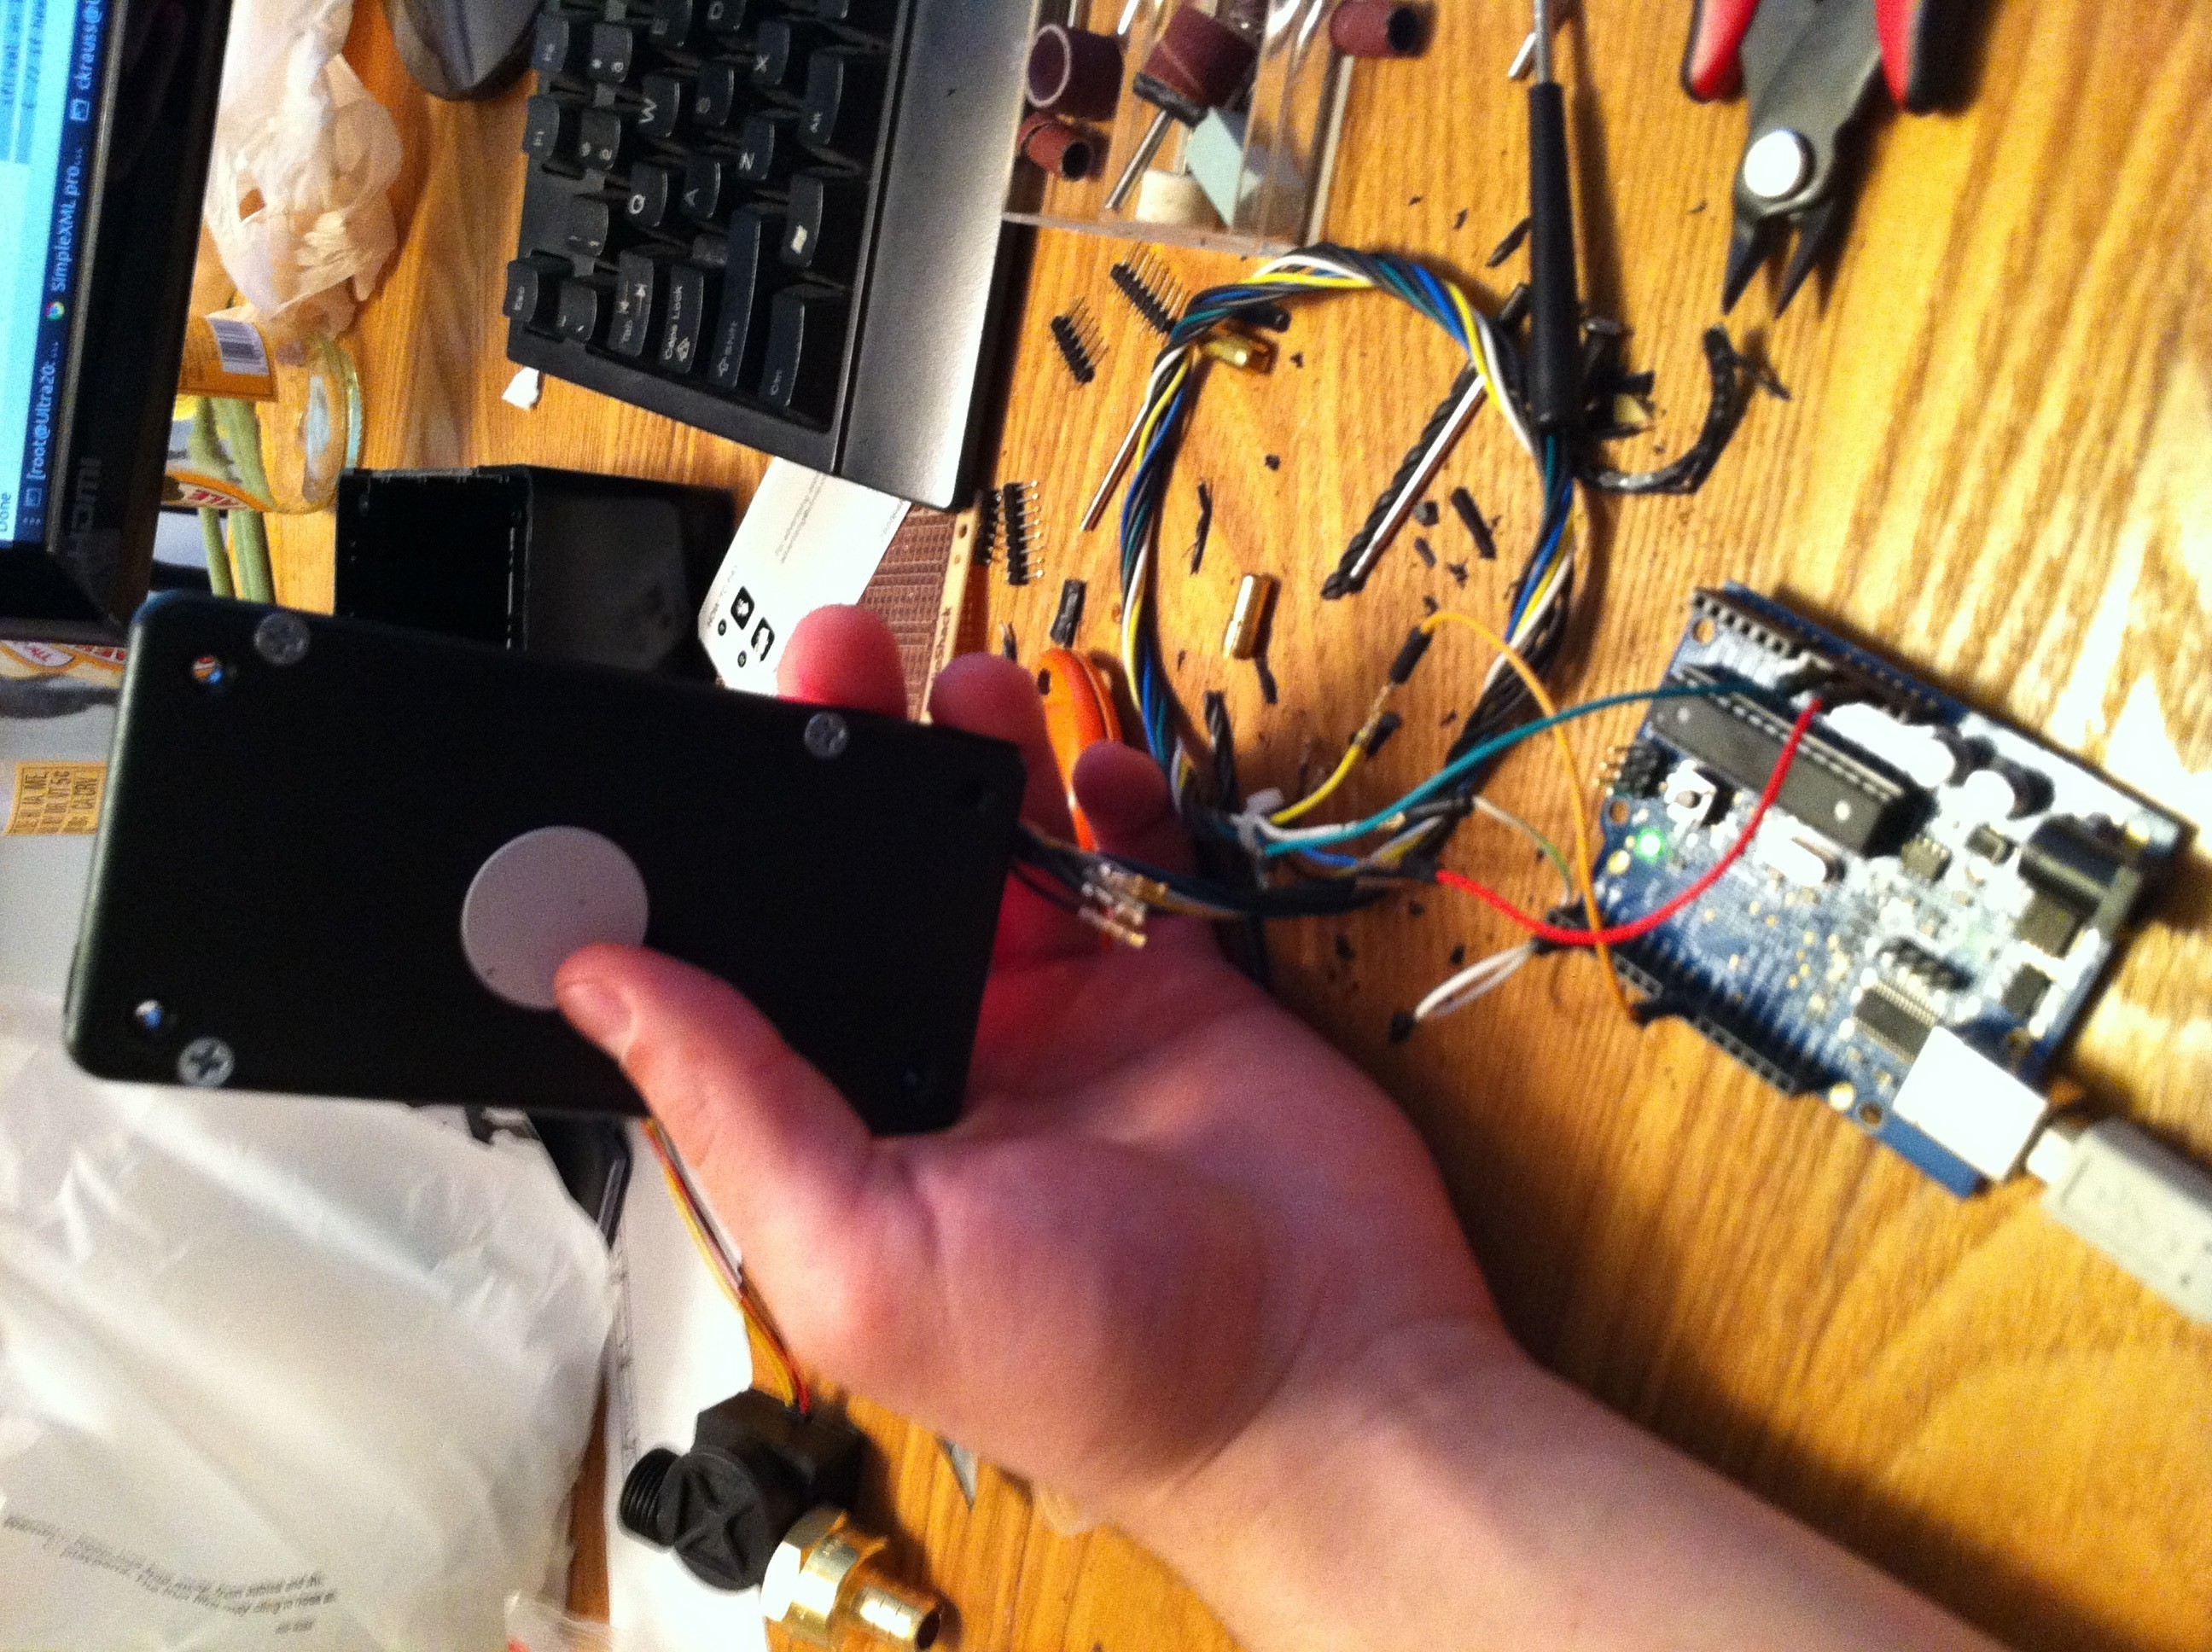
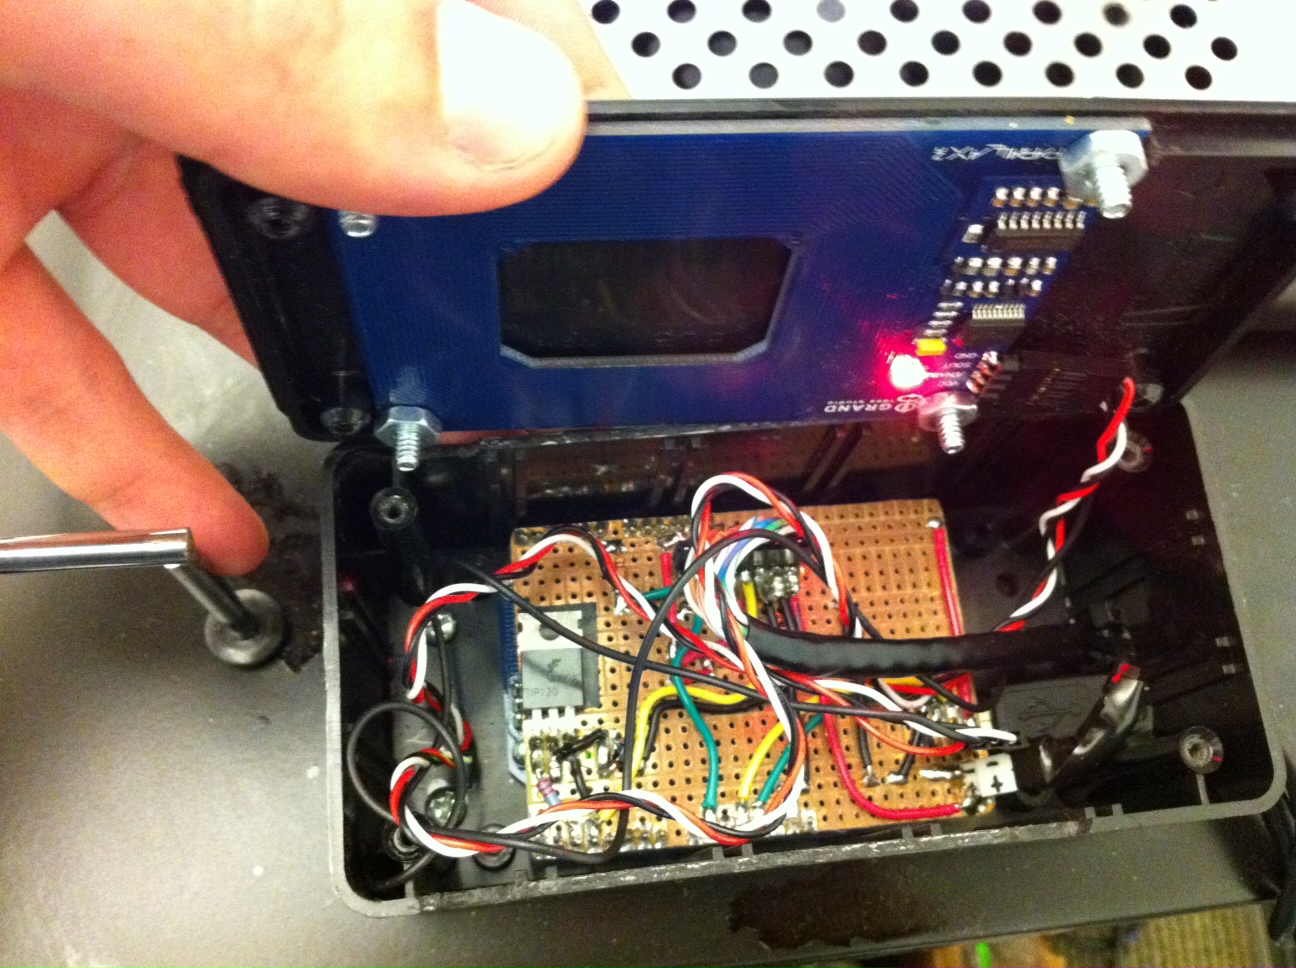
<p>After everyone decided all of the things that we wanted to see on this thing, we needed to put it all together. I decided the easiest and fastest way was creating an Arduino shield and using an Arduino Duemilanove. I worked on most of the hardware stuff and getting it all working. Two of the other guys(Dylan and Chris) decided to use Node.js to write the application, which turned out to be pretty nice besides a few serial library issues.</p>

<p>Here is a little description of the hardware:</p>

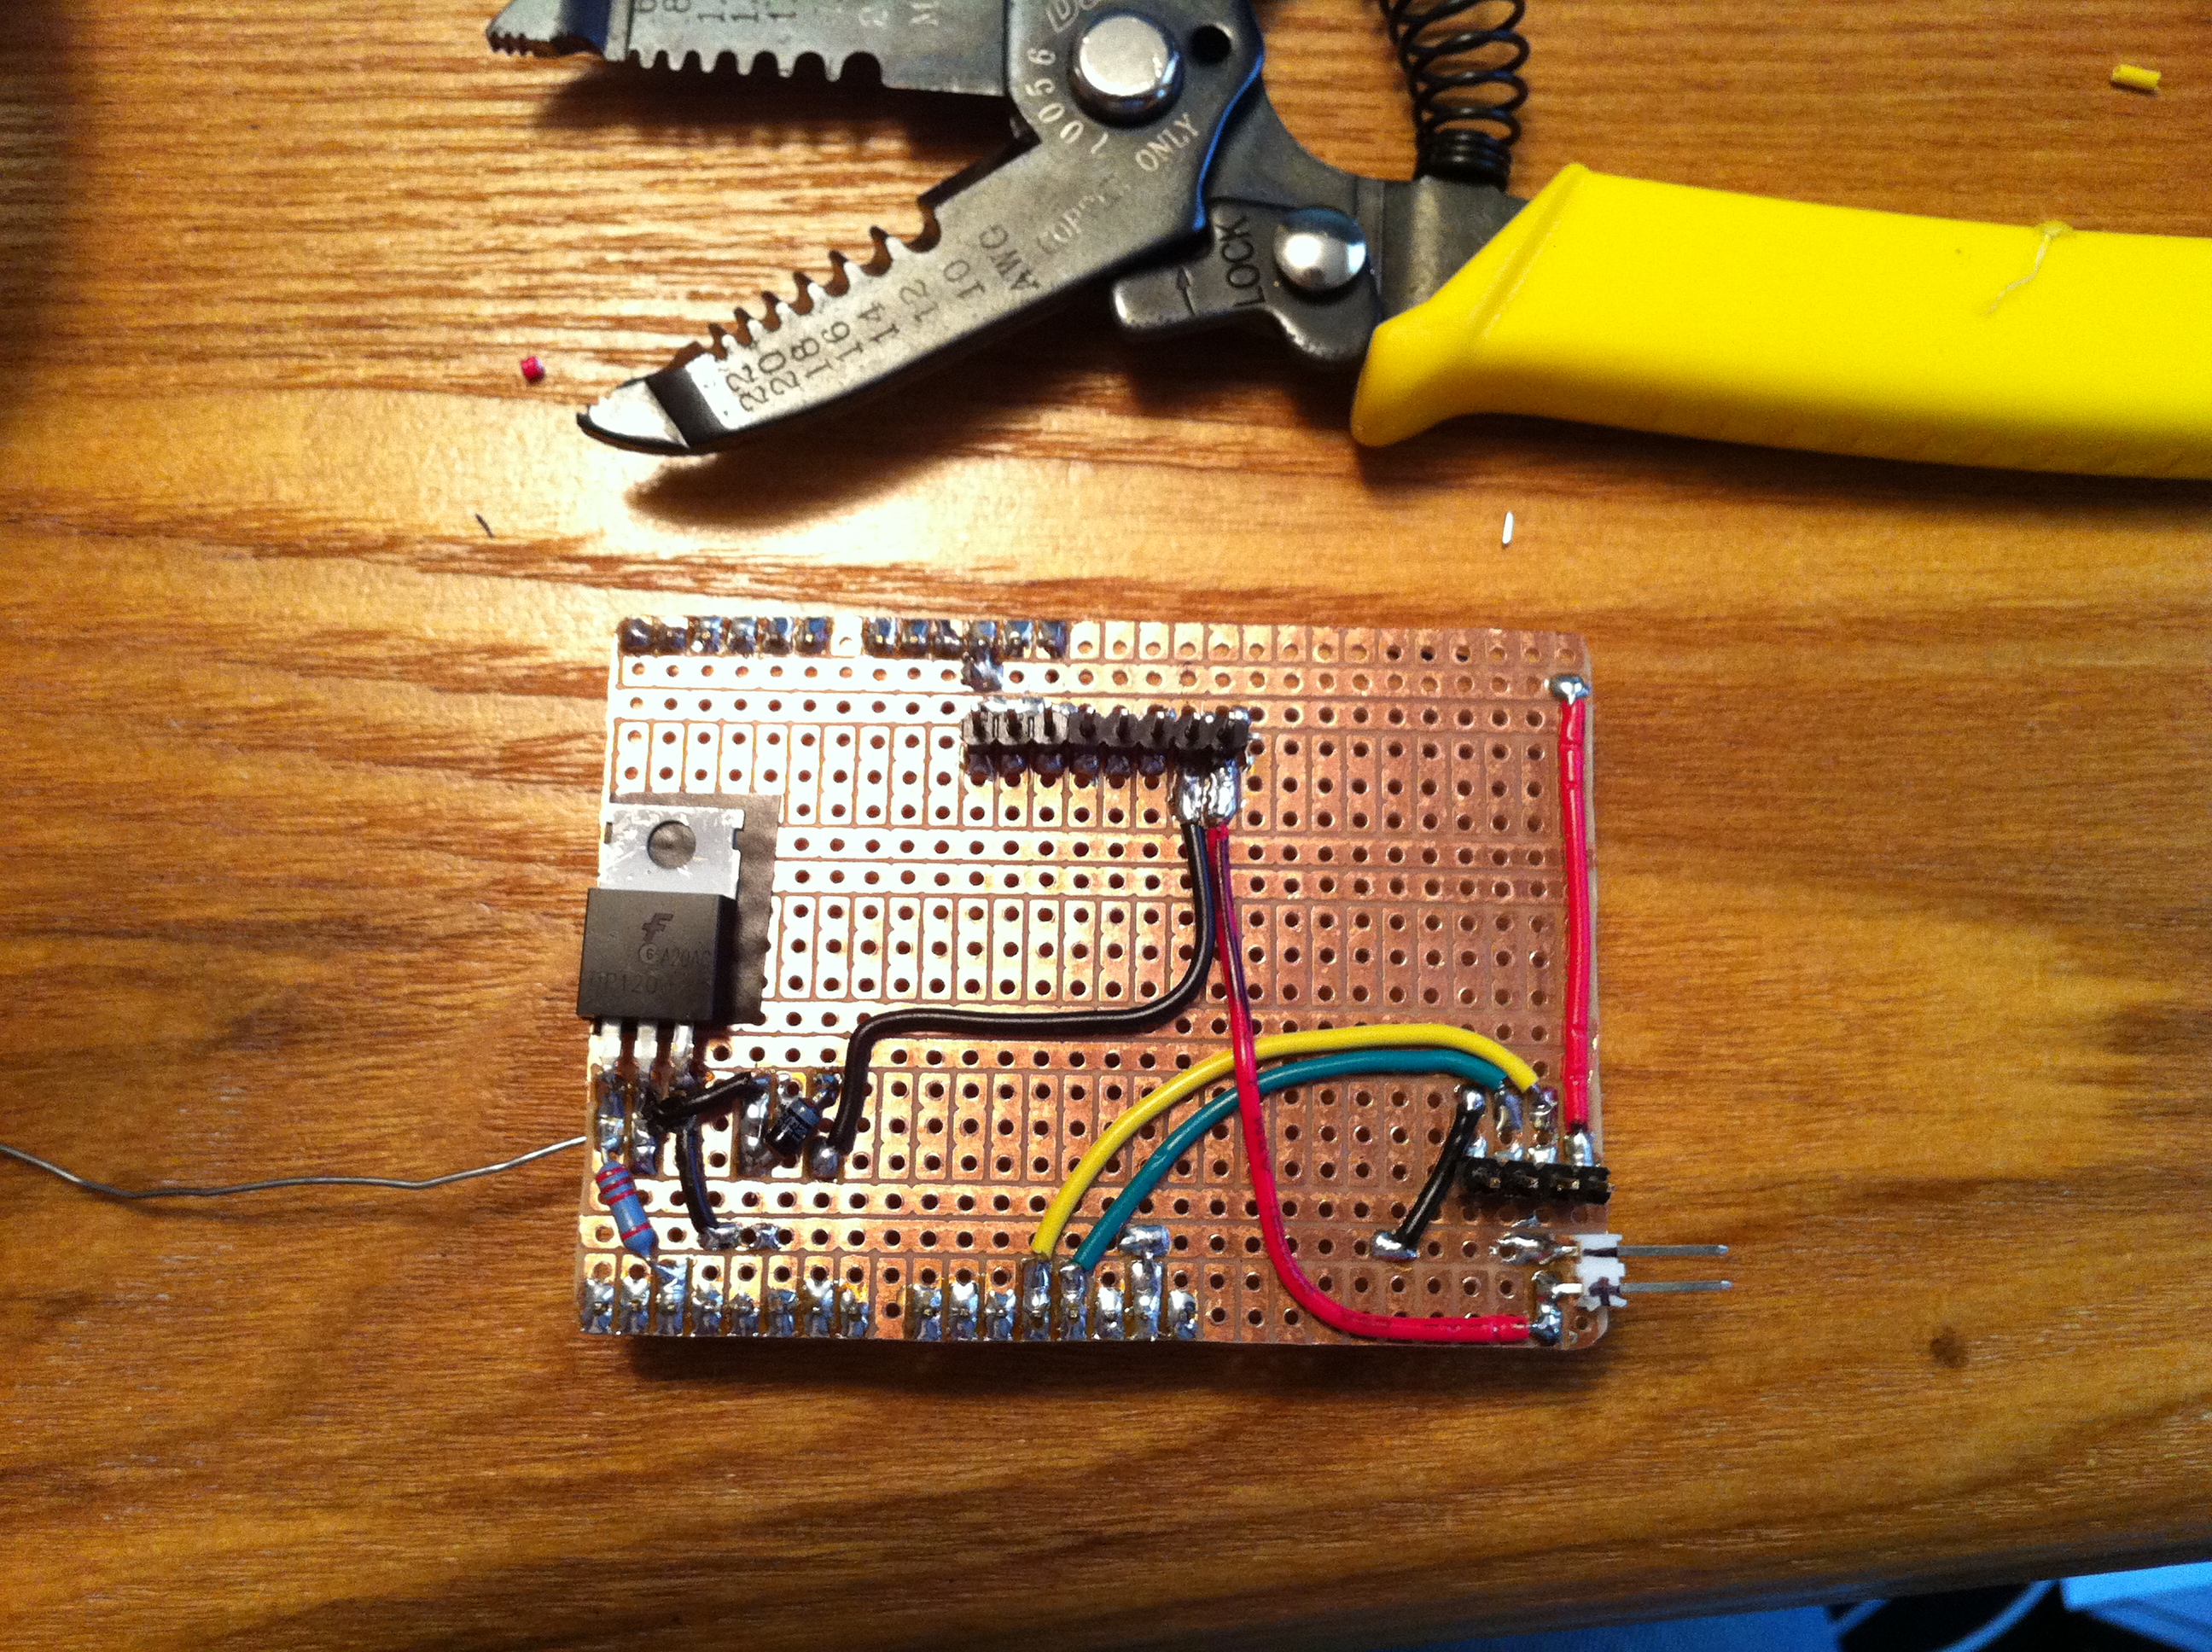
<p><em>&#8220;Starting from the top, the Arduino is powered by a usb cable plugged into the source computer it is running with. The Arduino has a custom made &#8220;shield&#8221; that allows the Arduino talk to the other components in the system. The shield was made out of a RadioShack pcb that was cut to fit into an arduino  shield. The shield has 3 io &#8220;ports&#8221; on it. The first is the 12v power source input. This is needed to run the 12v solenoid that allows flow access through the line. The second ports communicates with the UART based Parallax RFID Reader. This is a basic 125Khz RFID reader talking at 2400 baud. The third port allows communication with the temp sensor, solenoid, and flow rate sensor. I used Cat5 cable for the connection between these components and the Arduino shield.&#8221;</em></p>

<p>Here is a list of the hardware components:</p>

<ul>
<li><p><strong>Nostalgia KRS-2100 Keg-O-Rator</strong></p>

<ul>
<li><p>Source: Amazon</p></li>
<li><p><a href="http://www.amazon.com/Nostalgia-KRS-2100-Refrigerated-Beverage-Dispenser/dp/B000HJVYDQ/ref=sr_1_3?ie=UTF8&amp;qid=1306257637&amp;sr=8-3">http://www.amazon.com/Nostalgia-KRS-2100-Refrigerated-Beverage-Dispenser/dp/B000HJVYDQ/ref=sr_1_3?ie=UTF8&amp;qid=1306257637&amp;sr=8-3</a></p></li>
</ul>
</li>
<li><p><strong>Parallax RFID Card Reader Serial</strong></p>

<ul>
<li><p>Source: Ebay</p></li>
<li><p><a href="http://www.parallax.com/tabid/768/ProductID/114/Default.aspx">http://www.parallax.com/tabid/768/ProductID/114/Default.aspx</a></p></li>
</ul>
</li>
<li><p><strong>Arduino Duemilanove</strong></p>

<ul>
<li><p>Source: Ebay</p></li>
<li><p><a href="http://www.arduino.cc/en/Main/ArduinoBoardDuemilanove">http://www.arduino.cc/en/Main/ArduinoBoardDuemilanove</a></p></li>
</ul>
</li>
<li><p><strong>G1/2 Water Flow sensor</strong></p>

<ul>
<li><p>Source: Seeedstudio</p></li>
<li><p><a href="http://www.seeedstudio.com/depot/g12-water-flow-sensor-p-635.html">http://www.seeedstudio.com/depot/g12-water-flow-sensor-p-635.html</a></p></li>
</ul>
</li>
<li><p><strong>1/4&#8221; Electric Solenoid Valve 12-volt</strong></p>

<ul>
<li>Source: Ebay</li>
</ul>
</li>
<li><p><strong>One Wire Digital Temperature Sensor – DS18B20</strong></p>

<ul>
<li><p>Source: Sparkfun</p></li>
<li><p><a href="http://www.sparkfun.com/products/245">http://www.sparkfun.com/products/245</a></p></li>
</ul>
</li>
</ul>


<p>Some Hardware pictures&#8230;</p>

<p><a href="http://unstdio.org/images/2011/09/IMG_1367.jpg"><img src="http://unstdio.org/images/2011/09/IMG_1367-1024x764.jpg" alt="" /></a></p>

<p> <a href="http://unstdio.org/images/2011/09/IMG_1365.jpg"><img src="http://unstdio.org/images/2011/09/IMG_1365-1024x764.jpg" alt="" /></a></p>

<p><a href="http://unstdio.org/images/2011/09/IMG_1339-e1315594780817.jpg"><img src="http://unstdio.org/images/2011/09/IMG_1339-e1315933556456-739x1024.jpg" alt="" /></a></p>

<p><a href="http://unstdio.org/images/2011/09/photo6.jpg"><img src="http://unstdio.org/images/2011/09/photo6-1024x764.jpg" alt="" /></a></p>

<p><a href="http://unstdio.org/images/2011/09/photo-1.jpg"><img src="http://unstdio.org/images/2011/09/photo-1-1024x764.jpg" alt="" /></a></p>

<p><strong>Software</strong>:</p>

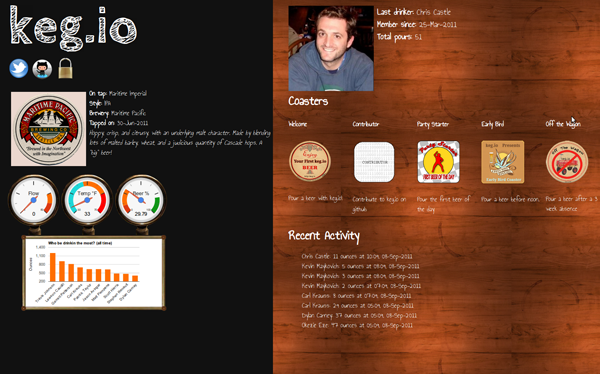
<p>In the software side, as I mentioned earlier, we are using Node.js. Everything is open source and you can find it on github <a href="https://github.com/vnc/keg.io">https://github.com/vnc/keg.io</a>. Some cool features that we added to keg.io are twitter integration, and some gamification type badges we call &#8220;coasters&#8221;. A member of keg.io can earn these coasters by different drinking habits. One of the first badges a person will receive is the &#8220;Welcome Coaster&#8221; after drinking their first beer poured from the kegerator.</p>

<p><img src="http://unstdio.org/images/2011/09/keg-io-welcome.jpg" alt="" /></p>

<p>So&#8230;I&#8217;ll explain how everything works. We have come up with a very simple communication protocol for communication between the Arduino and the host computer over serial. When the Arduino is started it initially grabs the temperature of the temp sensor and sends this data to the host computer. It will continue to do this every 10 seconds (adjustable) to allow close to real time temperature of the kegerator. Now we have an RFID card reader that is waiting for input from the user. When a card is scanned it grabs the card ID and sends that to the host computer for validation. If the card is not registered in the database, the application will display a denied message. (Don&#8217;t you even think about drinking from our Keg!)  If the card is registered and the user is valid the host computer sends back a request to the Arduino to open the solenoid and allow the user to pour beer. At this time the web ui displays a welcome message and shows a picture and information about the user pouring beer. Once the user starts to pour the beer, the flow is measured by the flow sensor and the flow rate is sent every second to the host computer which tracks the rates and calculates the amount of beer poured for that session. After 3 seconds of no flow rate the solenoid is closed and the next user can proceed to scan and repeat the process. What would a cool application like this be without twitter integration? After a user finishes his/her pour keg.io tweets about it. Check it out here: <a href="http://twitter.com/#!/keg_io">http://twitter.com/#!/keg_io</a></p>

<p>Here&#8217;s what keg.io looks like (at time of writing):</p>

<p><a href="http://unstdio.org/images/2011/09/keg-io.png"><img src="http://unstdio.org/images/2011/09/keg-io.png" alt="" /></a></p>

<p>Thanks to the people that have contributed to the project:</p>

<ul>
<li><p>Dylan</p></li>
<li><p>Carl</p></li>
<li><p>Chris</p></li>
<li><p>Garrett</p></li>
</ul>


<p>-C4</p>
]]></content>
  </entry>
  
  <entry>
    <title type="html"><![CDATA[toorcon: Seattle]]></title>
    <link href="http://www.unstdio.org/blog/2011/07/09/toorcon-seattle/"/>
    <updated>2011-07-09T05:41:40-07:00</updated>
    <id>http://www.unstdio.org/blog/2011/07/09/toorcon-seattle</id>
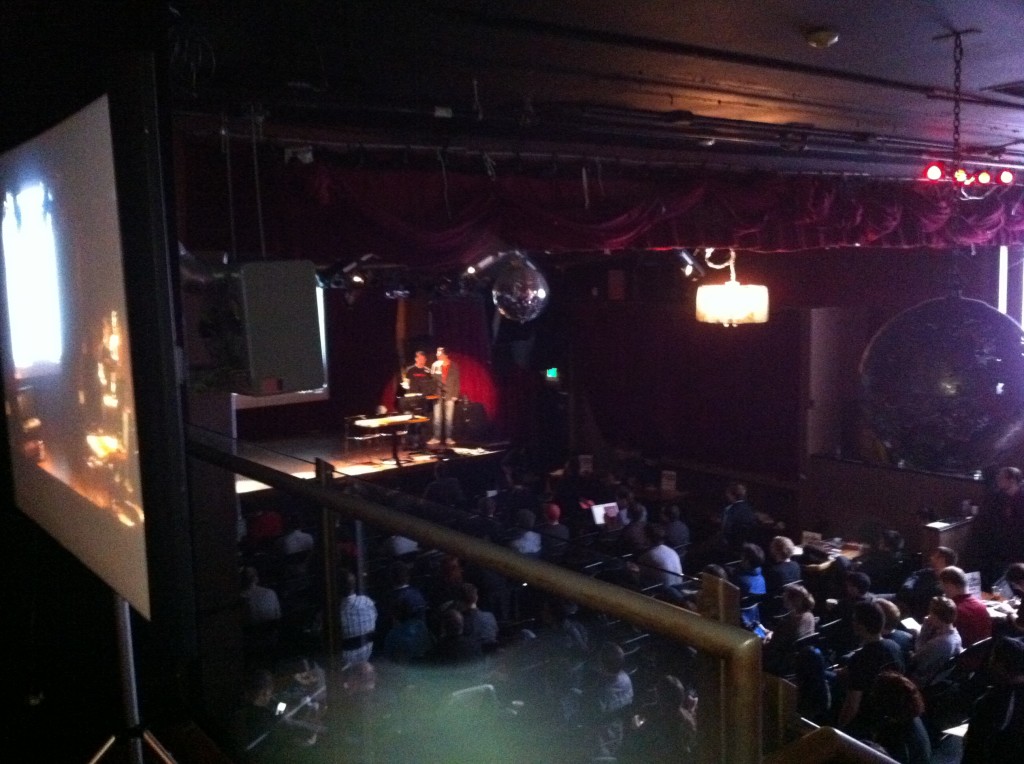
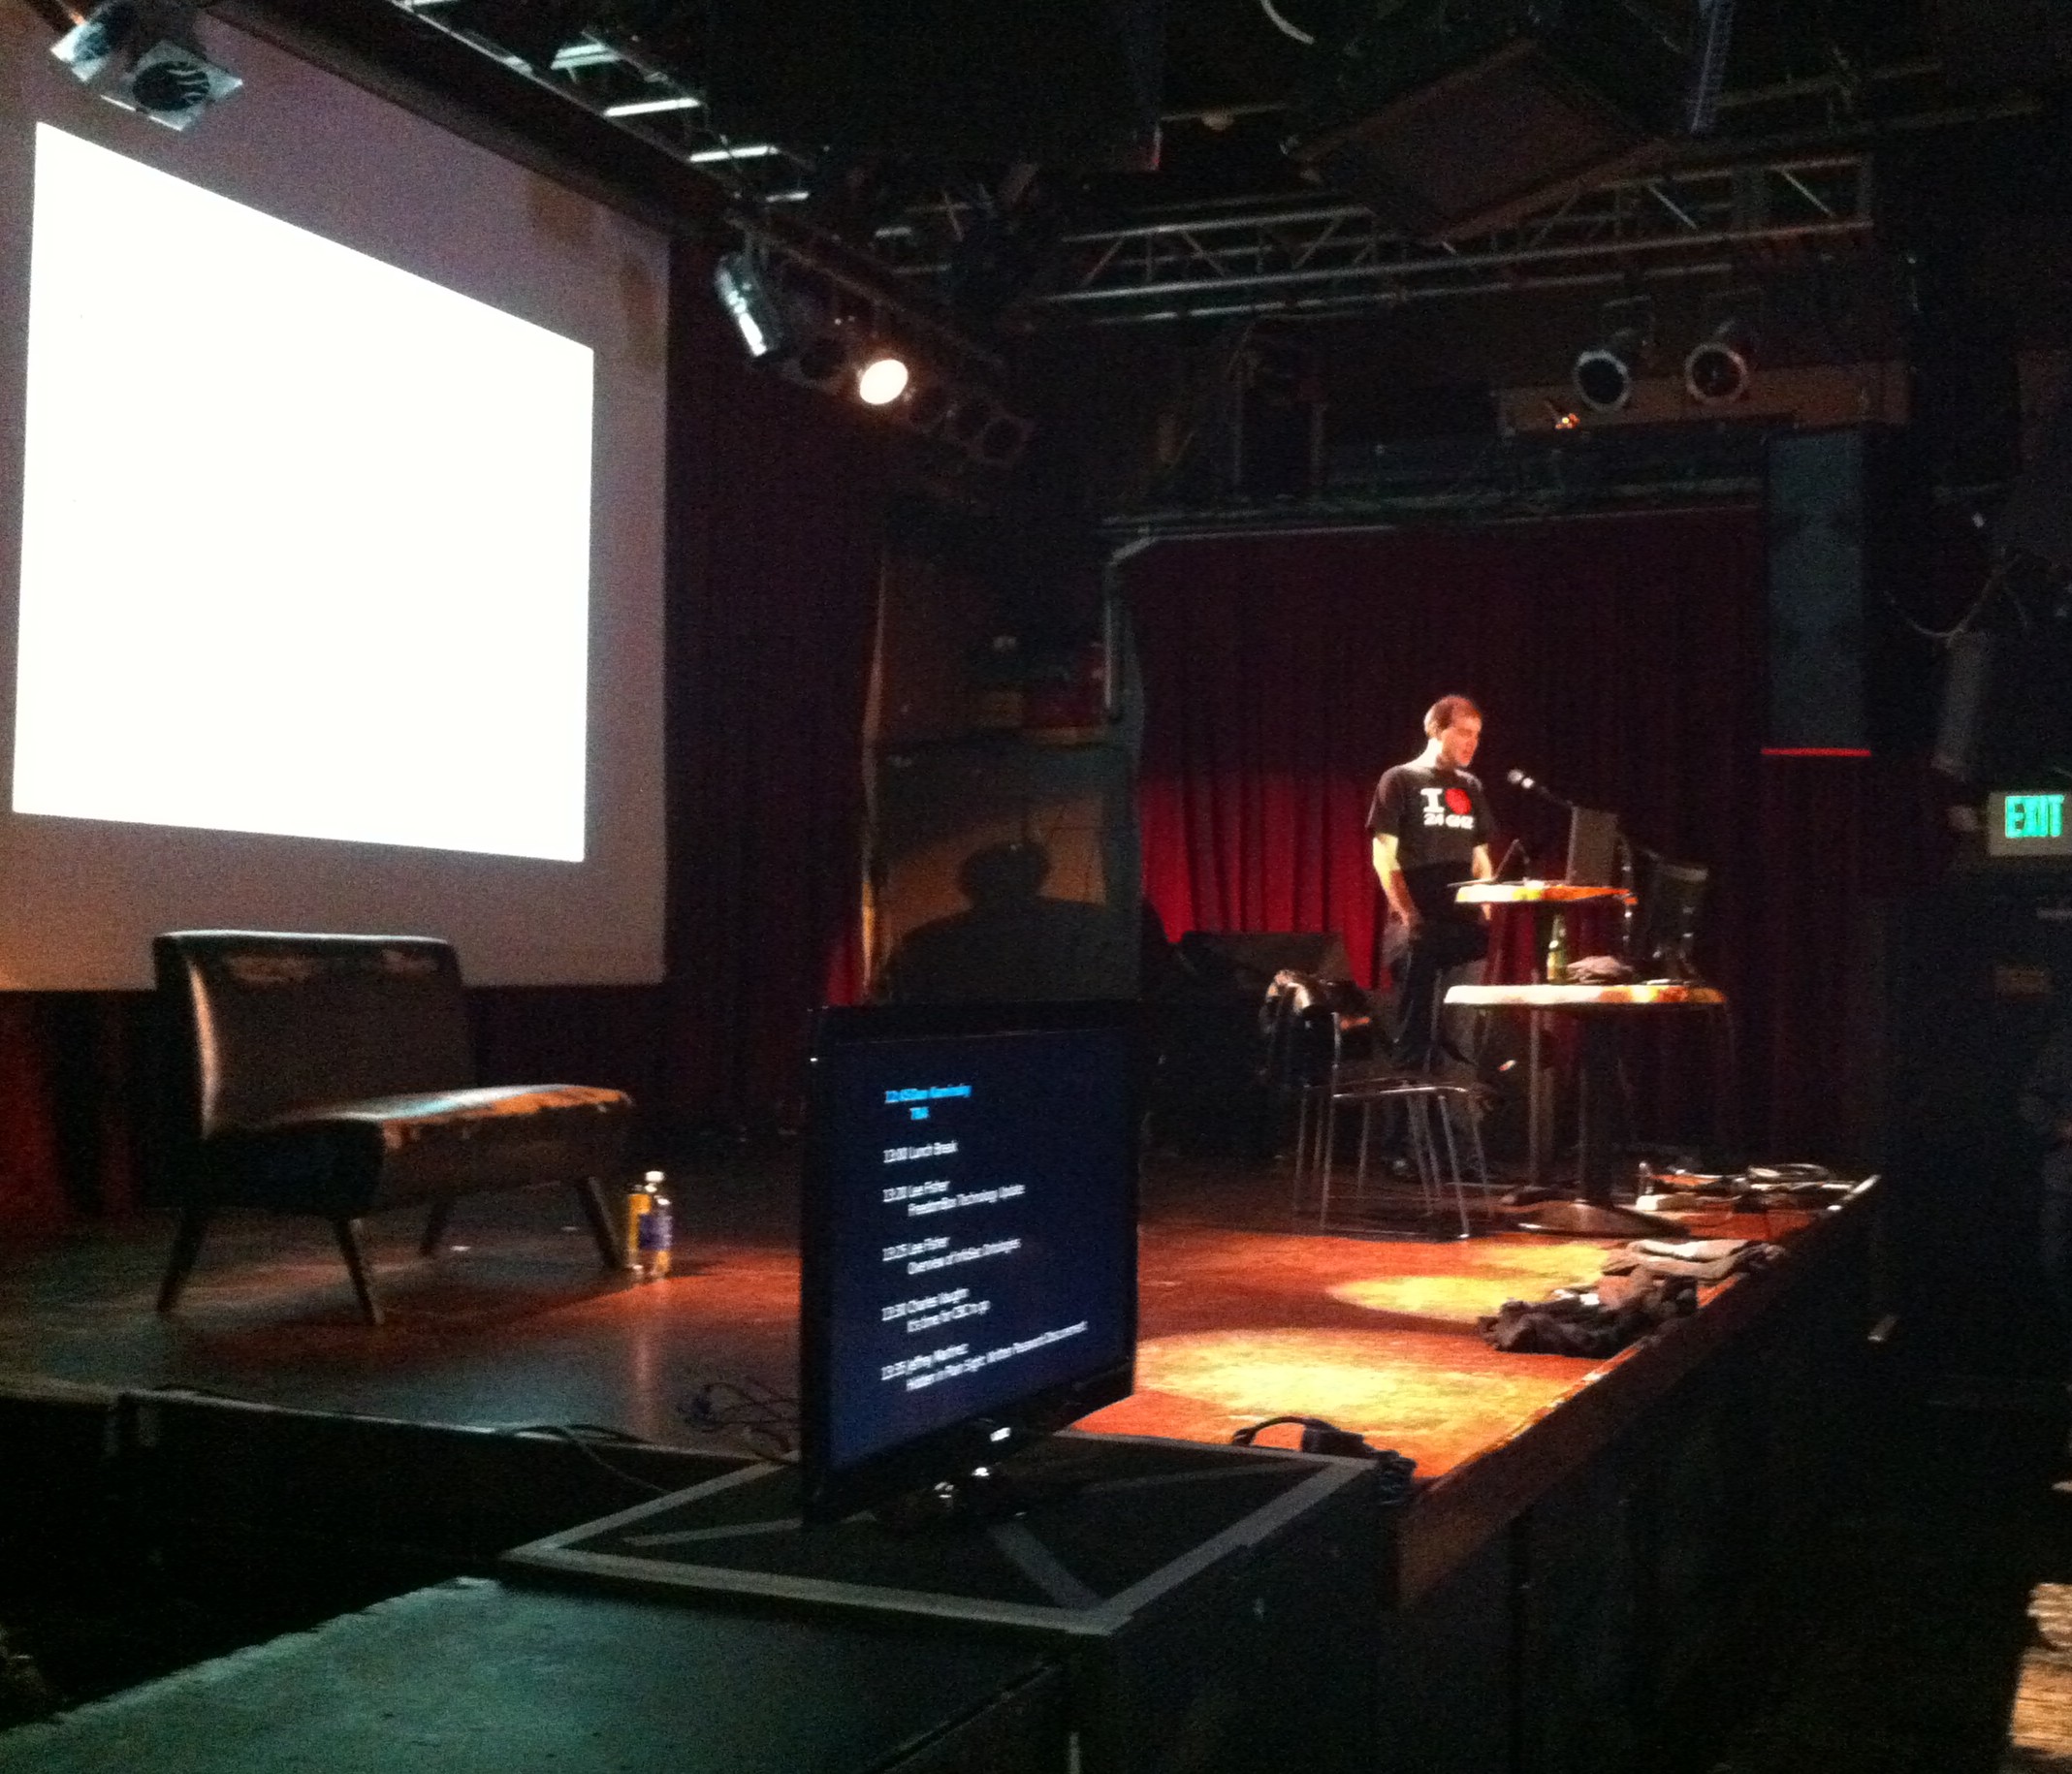
    <content type="html"><![CDATA[<p>I meant to write about this last week but have been pretty busy with some other projects I have been working on. I have to say I had a great time at toorcon Seattle this year. Props to David for getting this event all put together.</p>

<p><a href="http://unstdio.org/images/2011/06/photo-1.jpg"><img src="http://unstdio.org/images/2011/06/photo-1-980x1024.jpg" alt="" /></a></p>

<p>There were definitely some good talks, which inspired me to do a bit more poking around. The first one I want to mention was the talk titled “Get Off of My Cloud: Cloud Credential Compromise and Exposure” This touched on amazon&#8217;s ec2 public AMI distribution and the security risks involved with using AMI&#8217;s not created by you. It brought up some interesting points and some issues that people may have overlooked. He mentioned that they have written some tools to “clean up” the AMI&#8217;s before sharing them out to the public. They didn&#8217;t release the scripts at the con and he mentioned that they weren&#8217;t publicly available yet so I went ahead an wrote some scripts (in bash) to look for the vulnerabilities when using an ami for the the first time, whether it a be a public ec2 AMI or an AMI that is put out by amazon.</p>

<p><img src="http://unstdio.org/images/2011/06/photo-2-1024x764.jpg" alt="" /></p>

<p><a href="http://unstdio.org/images/2011/07/photo-6.jpg"><img src="http://unstdio.org/images/2011/07/photo-6-1024x797.jpg" alt="" /></a></p>

<p>The second talk that I found real interesting was the “We Are The Robots: Social Hacking With Bot Swarms” which talked about the connections made by users on twitter. They had a competition with bots on twitter to see what relationships bots can create between two other people and what information links them.</p>

<p><a href="http://unstdio.org/images/2011/07/photo-5.jpg"><img src="http://unstdio.org/images/2011/07/photo-5-1024x738.jpg" alt="" /></a></p>

<p><a href="http://unstdio.org/images/2011/07/photo-3.jpg"><img src="http://unstdio.org/images/2011/07/photo-3-1024x876.jpg" alt="" /></a></p>

<p>The last talk I that was interesting was “Highly concurrent Python for brute forcing and discovery”. I only have just started using python in some projects so this was a bit more advanced that I was used to but seriously great information. He talked about Python coroutines and epoll to build your own high performance brute forcing and discovery tools.</p>

<p><a href="http://unstdio.org/images/2011/07/photo-4.jpg"><img src="http://unstdio.org/images/2011/07/photo-4-852x1024.jpg" alt="" /></a></p>
]]></content>
  </entry>
  
  <entry>
    <title type="html"><![CDATA[Make windows calls from linux.]]></title>
    <link href="http://www.unstdio.org/blog/2011/06/07/make-windows-calls-from-linux/"/>
    <updated>2011-06-07T21:15:27-07:00</updated>
    <id>http://www.unstdio.org/blog/2011/06/07/make-windows-calls-from-linux</id>
    <content type="html"><![CDATA[<p>I was recently taking a look a making remote calls from linux to a windows server. I found this nice little tool that makes this task pretty simple with <strong>winexe</strong>.  It&#8217;s basically like psexe but for linux. I was having problems getting version 0.80 working on some environments but v 0.90 seems to work on everything I have tried. (complied with a new version of glibc)  Here are the options.</p>

<p>winexe version 0.90This program may be freely redistributed under the terms of the GNU GPLUsage:</p>

<pre><code>winexe [-?|--help] [--usage] [-d|--debuglevel DEBUGLEVEL]       [--debug-stderr] [-s|--configfile CONFIGFILE] [--option=name=value]        [-l|--log-basename LOGFILEBASE] [--leak-report] [--leak-report-full]        [-R|--name-resolve NAME-RESOLVE-ORDER]        [-O|--socket-options SOCKETOPTIONS] [-n|--netbiosname NETBIOSNAME]        [-W|--workgroup WORKGROUP] [--realm=REALM] [-i|--scope SCOPE]        [-m|--maxprotocol MAXPROTOCOL] [-U|--user [DOMAIN\]USERNAME[%PASSWORD]]        [-N|--no-pass] [--password=STRING] [-A|--authentication-file FILE]        [-S|--signing on|off|required] [-P|--machine-pass]        [--simple-bind-dn=STRING] [-k|--kerberos STRING]        [--use-security-mechanisms=STRING] [-V|--version] [--uninstall]        [--reinstall] [--system] [--runas=[DOMAIN\]USERNAME%PASSWORD]        [--interactive=0|1] [--ostype=0|1|2] //host command
</code></pre>

<p>Apparently it&#8217;s maintained by Stuart Henderson, but it looks somewhat dead? The site link doesn&#8217;t work. (returns blank page) <a href="http://eol.ovh.org/winexe/">http://eol.ovh.org/winexe/</a></p>

<p>Some ways to use it:</p>

<pre><code>winexe -U DOMAIN/Username%Passwd //192.168.1.123 "ipconfig /all"


winexe -U DOMAIN/Username%Passwd //remote.com \
'cmd /C net stop SomeService &amp;&amp; net start SomeService &amp;&amp; echo AutoUpdates service restarted'
</code></pre>

<p>or get a shell,</p>

<pre><code>winexe -U DOMAIN/Username%Passwd //remote.com 'cmd.exe'
</code></pre>

<p>or use it to configure synergy,</p>

<pre><code>#!/bin/bash
OUT='winexe -U MAIN/User%Pass --runas MAIN/UserB%Pass //your-other-comp "ipconfig"'
IP=`$OUT |  grep "IPv4" | awk {'print $14'}`
synergyc $IP
</code></pre>

<p>This site also has some more info on it: <a href="http://opensourceinfo.blogspot.com/2010/01/winexe.html">http://opensourceinfo.blogspot.com/2010/01/winexe.html</a></p>
]]></content>
  </entry>
  
  <entry>
    <title type="html"><![CDATA[Making remote server calls from PHP]]></title>
    <link href="http://www.unstdio.org/blog/2011/05/25/making-remote-server-calls-from-php/"/>
    <updated>2011-05-25T01:16:03-07:00</updated>
    <id>http://www.unstdio.org/blog/2011/05/25/making-remote-server-calls-from-php</id>
    <content type="html"><![CDATA[<p>I was doing some php scripting today and needed to call a remote server to see if it was running a certain process. It seems like a valid enough request. I spent some time looking into php&#8217;s exec() and system() functions to find a way to call ssh to login and run the command. I kept running into the problem of the ssh session needing to be interactive. I started to look around for other options in php to ssh to remote machine and saw the SSH2 Manual. This was great but needed the ssh2 extension to be installed and in my case it wasn&#8217;t and I didn&#8217;t want to have to install additional software. I then found the phpseclib library which worked out great. It&#8217;s easy to use and worked right out of the box without any other software needed. Check it out: <a href="http://phpseclib.sourceforge.net/">http://phpseclib.sourceforge.net/</a></p>

<p>You can read the documentation on the site or use this simple test script to get it working.</p>
]]></content>
  </entry>
  
  <entry>
    <title type="html"><![CDATA[php-cli awesomeness]]></title>
    <link href="http://www.unstdio.org/blog/2011/05/23/php-cli-awesomeness/"/>
    <updated>2011-05-23T22:24:50-07:00</updated>
    <id>http://www.unstdio.org/blog/2011/05/23/php-cli-awesomeness</id>
    <content type="html"><![CDATA[<p>I know, command line line php has been forever and it&#8217;s nothing new. I have been coding in php for over 5 years now but not until recently have I needed to use to use it for something more than web application development. In the past couple months I have been using the amazon AWS environment. There are a ton of tools built for AWS and a very good API but I have found some things that I have needed to do that arn&#8217;t made easy. One example is duplicating or copying an EC2 security group. Do to some infrastructure changes we wanted to duplicate an already existing security group with only minor changes. In our case the security group had a lot of custom firewall rules that would take too long to duplicate. So here is a script to copy EC2 groups:</p>

<pre><code>&lt;?php

echo "\n";

echo "#######################\n";

echo "Copy EC2 Security Group\n";

echo "#######################\n";

echo "\n";

echo "Enter security group you want to copy FROM: ";

$handle = fopen ("php://stdin","r");

$grp1 = fgets($handle);

$grp1 = trim($grp1);

echo "\n";

echo "Enter security group you want to copy TO: ";

$handle = fopen ("php://stdin","r");

$grp2 = fgets($handle);

$grp2 = trim($grp2);

echo "\n";

echo "You are going to copy settings from ".$grp1." to ".$grp2." Is this correct? (y/n):";

$handle = fopen ("php://stdin","r");

$response = fgets($handle);

$response = trim($response);

//echo $response;

if($response == 'y'){

echo "Getting settings from ".$grp1."...\n";

$cmd = "ec2-describe-group ".$grp1;

exec($cmd, $lines);

echo "Copying group settings...\n";

foreach($lines as $line){

//echo $line."\n";

$values = explode("\t",$line);

//foreach($values as $value){

//echo $value."\n";

//}

if(isset($values[4])){

if($values[4] == "icmp"){

$cmd = "ec2-authorize ".$grp2." -P icmp ".$values[5].":".$values[6]." -u ".$values[1]." -o ".$values[11];

//echo $cmd;

exec($cmd);

}elseif($values[4] == "tcp"){

if(isset($values[10])){

$cmd = "ec2-authorize ".$grp2." -P tcp -p ".$values[5]." -u ".$values[1]." -o ".$values[11];

//echo $cmd."\n";

exec($cmd);

}else{

$cmd = "ec2-authorize ".$grp2." -P tcp -p ".$values[5]." -s ".$values[9];

//echo $cmd."\n";

exec($cmd);

}

}elseif($values[4] == "udp"){

if(isset($values[10])){

$cmd = "ec2-authorize ".$grp2." -P udp -p ".$values[5]." -u ".$values[1]." -o ".$values[11];

//echo $cmd."\n";

exec($cmd);

}else{

$cmd = "ec2-authorize ".$grp2." -P udp -p ".$values[5]." -s ".$values[9];

//echo $cmd."\n";

exec($cmd);

}

}

}

}

}else{

echo "quit";

exit;

}

?&gt;
</code></pre>
]]></content>
  </entry>
  
  <entry>
    <title type="html"><![CDATA[Shark Attack!]]></title>
    <link href="http://www.unstdio.org/blog/2011/02/10/shark-attack/"/>
    <updated>2011-02-10T18:16:41-08:00</updated>
    <id>http://www.unstdio.org/blog/2011/02/10/shark-attack</id>
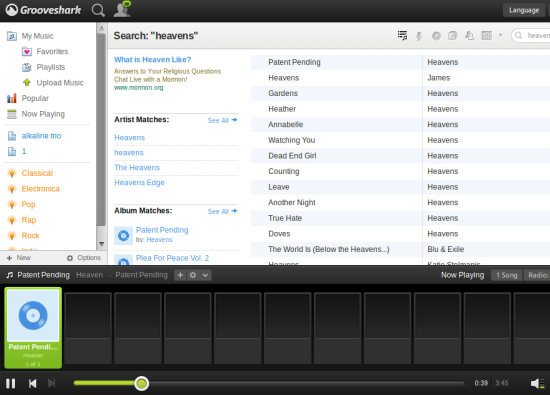
    <content type="html"><![CDATA[<p>First, I want to say that I am a big supporter of Grooveshark. I think it&#8217;s an awesome service and I have purchased merch from them. That being said, yesterday I started looking for a way to rip the songs from Grooveshark. It has been a while since I kept an up-to-date music collection.</p>

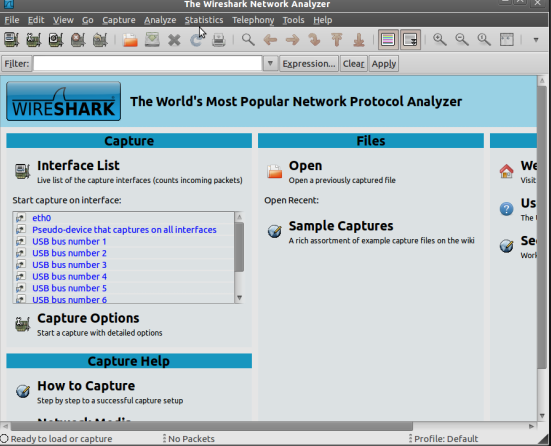
<p>The files that are streamed to your computer are temporarily stored on your local machine. This means that we can save the packets that are being sent to your computer as an actual audio file. First, we need to use a network protocol analyzer that will allow us to find the packets being sent the to the computer. This is where Wireshark comes in. We can start by downloading Wireshark and installing it. (not going to show you that here) Once we have it running, it should look like this: (May need to run as root)</p>

<p><a href="http://unstdio.org/images/2011/02/ws1.png"><img src="http://unstdio.org/images/2011/02/ws1.png" alt="" /></a></p>

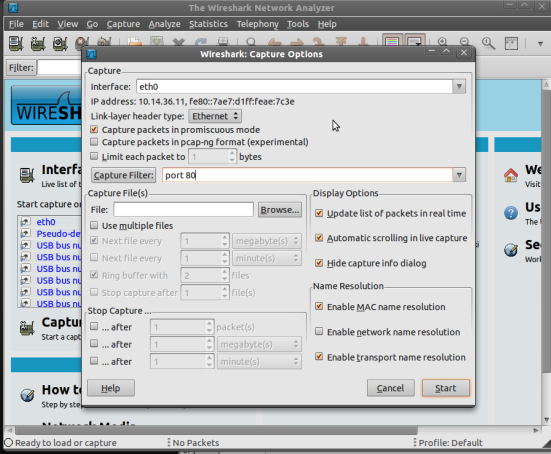
<p>Next we need to configure some settings. Since we know that we are accessing Grooveshark through a web page is a good bet that they are pushing these packets over http. We will limit the filter to only capture port 80 traffic since that&#8217;s all we really care about right now. Set this up in Capture -> Options. See below.</p>

<p><a href="http://unstdio.org/images/2011/02/ws2.png"><img src="http://unstdio.org/images/2011/02/ws2.png" alt="" /></a></p>

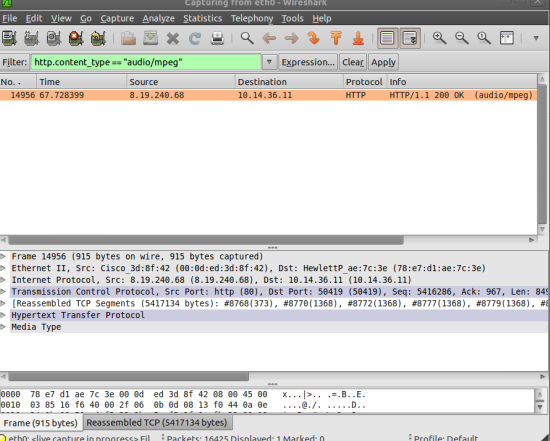
<p>Now we can start the capture. Next go the the Grooveshark site and start playing a song. There will be a lot of packets showing up in your list. The main packet that you are looking for is one with a type of “audio/mpeg”.  You can also make this easier if you use this filter: http.content_type == &#8220;audio/mpeg&#8221;</p>

<p>If you use the filter method then you should only see one packet show up. It should look something like this:</p>

<p><a href="http://unstdio.org/images/2011/02/ws4.png"><img src="http://unstdio.org/images/2011/02/ws4.png" alt="" /></a></p>

<p><a href="http://unstdio.org/images/2011/02/ws3.png"><img src="http://unstdio.org/images/2011/02/ws3.png" alt="" /></a></p>

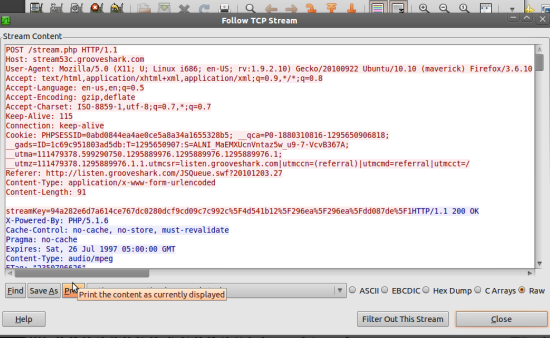
<p>Right click on the packet and choose follow tcp stream. This should assemble all the related packets and bring up a summary asking you what you would like to do with the packets. On the right hand side there will be some options for how you would like to save your stream content. Choose “Raw” and click the “Save As” button. You can now save the file as whateveryouwant.mp3. You can now go to the folder that you saved it in and play the file in your favorite music player. (May need to chmod the file if was downloaded by root.)</p>

<p><a href="http://unstdio.org/images/2011/02/ws5.png"><img src="http://unstdio.org/images/2011/02/ws5.png" alt="" /></a></p>

<p><a href="http://unstdio.org/images/2011/02/ws6.png"><img src="http://unstdio.org/images/2011/02/ws6.png" alt="" /></a></p>

<p>Note: I found someone who has done the same thing when I was looking how to save the stream. So I can not take 100% credit for this.</p>

<p>Also: I looked into writing something to automate this process but there is already another project that is doing this. Check out <a href="http://groovedown.tasteless.us/">http://groovedown.tasteless.us/</a></p>
]]></content>
  </entry>
  
  <entry>
    <title type="html"><![CDATA[Apple TV with Compact Flash]]></title>
    <link href="http://www.unstdio.org/blog/2011/01/19/apple-tv-with-compact-flash/"/>
    <updated>2011-01-19T22:11:01-08:00</updated>
    <id>http://www.unstdio.org/blog/2011/01/19/apple-tv-with-compact-flash</id>
    <content type="html"><![CDATA[<p>I have been pretty busy these past couple months. I got a new job working with the Amazon AWS environment which has kept me pretty busy. I tried this compact flash swap a month ago with poor results. I tried it again last weekend with a faster compact flash card which was a lot better.</p>

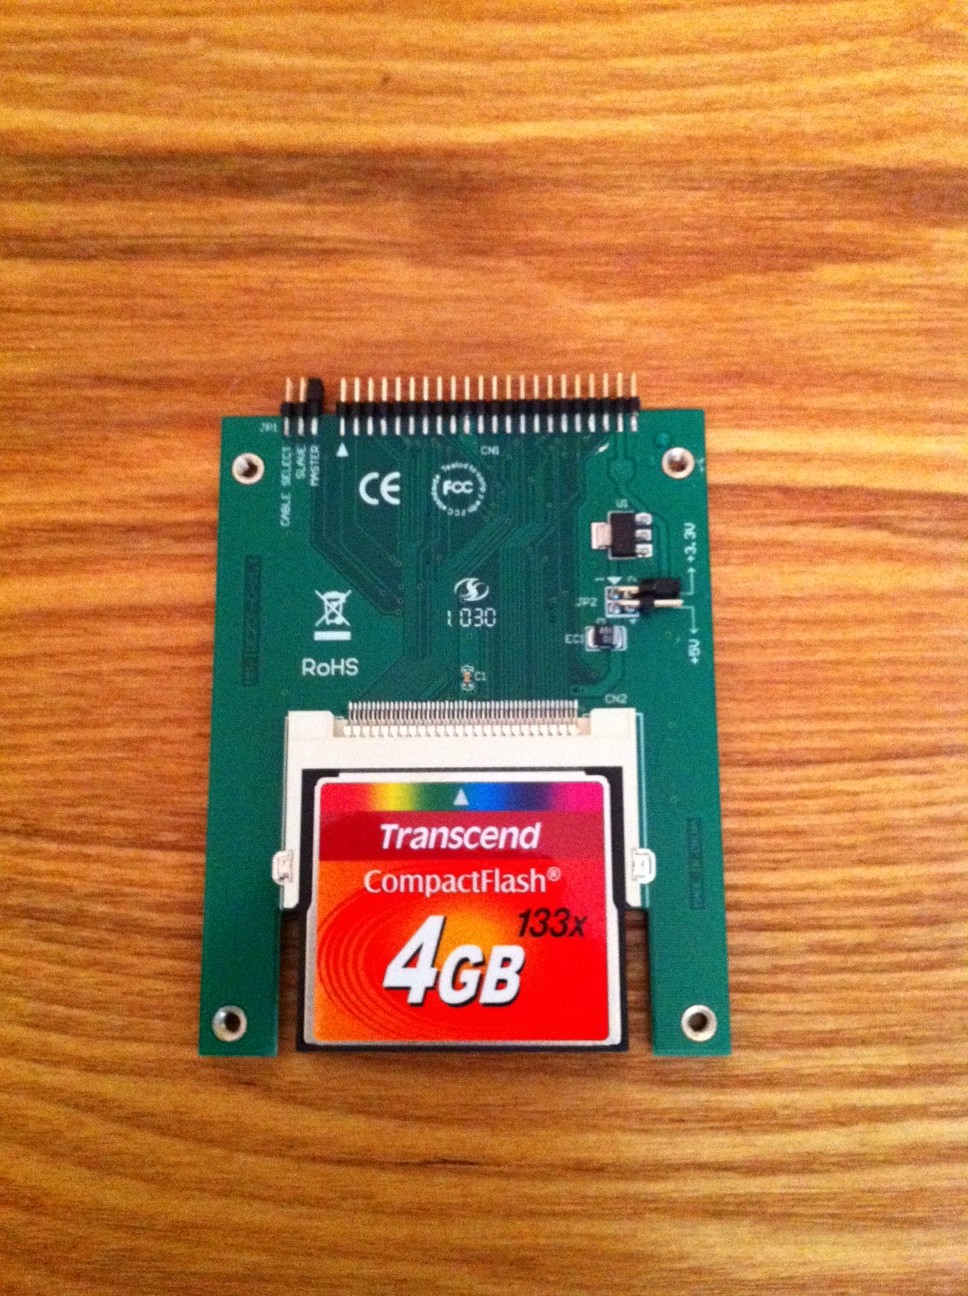
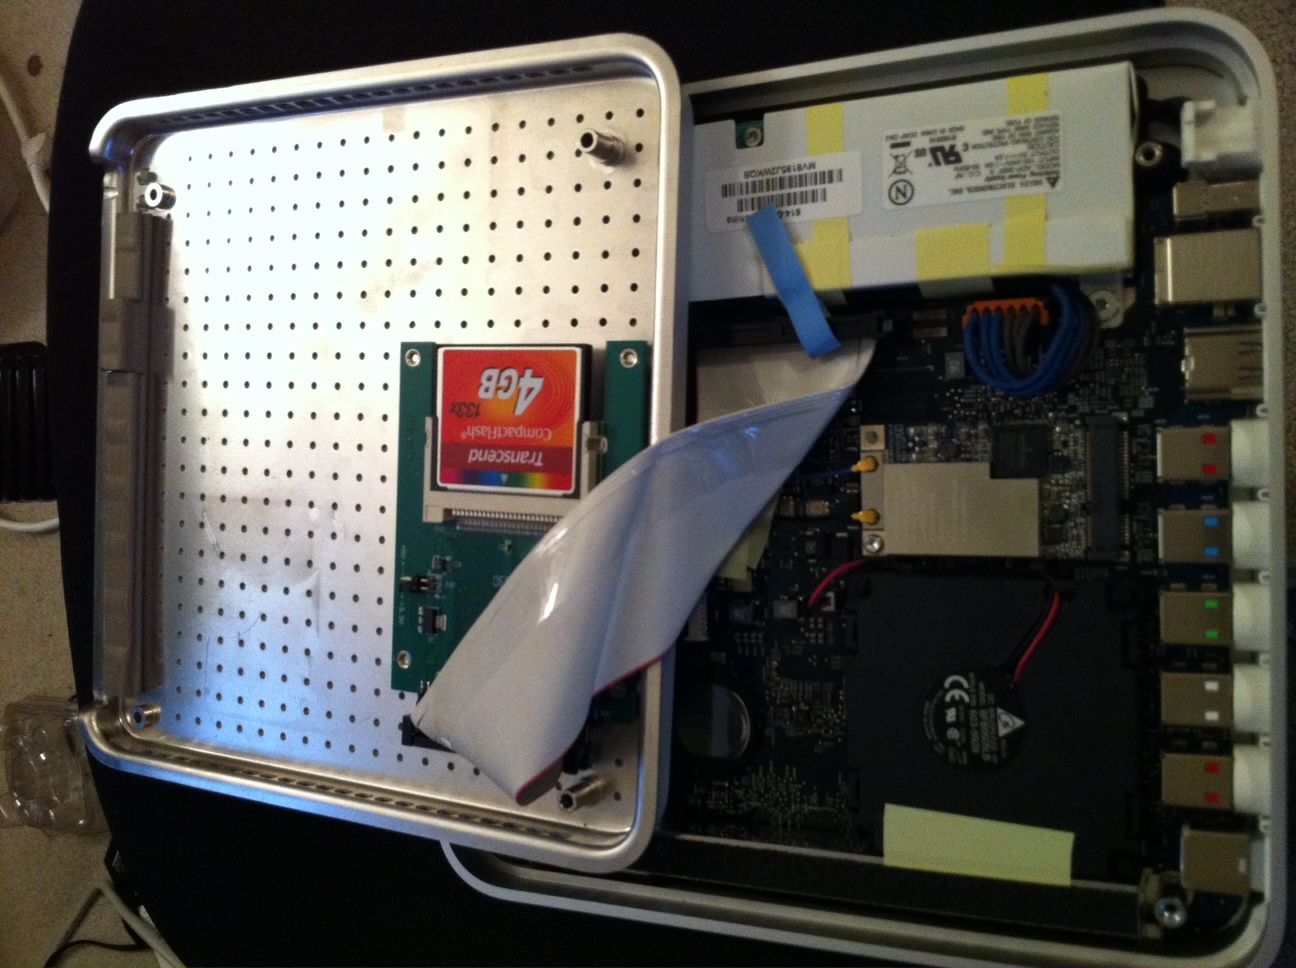
<p>First I ordered a 2.5&#8221; ide 44pin to compact flash adapter and a Transcend 4gb 133 CF card. The read and write speeds on this card are terrible. I would not recommend this card for this purpose. They were listed on ebay as:</p>

<ul>
<li><p>CF Compact flash to 2.5&#8221; IDE 44 pin Adapter SSD ($8.99)</p></li>
<li><p>TRANSCEND 4 GB Compact Flash Card Type 133X NEW ($14.94)</p></li>
</ul>


<p>I later bought a “PixelFlash 4gb 400x” card. Although this was a no-name brand (at least to me) it worked pretty well. The read and write speeds were decent and are similar to the internal HDD. I swapped it into the Apple TV and I&#8217;m running a the Beta4 of the Openelec OS<a href="http://unstdio.org/images/2011/01/photo2-e1295474791444.jpg"><img src="http://unstdio.org/images/2011/01/photo2-e1295474791444.jpg" alt="" /></a></p>

<p><a href="http://unstdio.org/images/2011/01/photo2-e1295474791444.jpg">
</a><a href="http://unstdio.org/images/2011/01/photo.jpg"><img src="http://unstdio.org/images/2011/01/photo-e1295475027843.jpg" alt="" /></a></p>
]]></content>
  </entry>
  
  <entry>
    <title type="html"><![CDATA[Compact Flash Apple TV (SSD)]]></title>
    <link href="http://www.unstdio.org/blog/2010/12/19/compact-flash-apple-tv-ssd/"/>
    <updated>2010-12-19T08:17:44-08:00</updated>
    <id>http://www.unstdio.org/blog/2010/12/19/compact-flash-apple-tv-ssd</id>
    <content type="html"><![CDATA[<p>I have been recently been working closely with the guys from openelec. I have also been testing the builds on the apple tv and reporting bugs. I replaced the original 40gb apple drive with a spare 30gb dive I had laying around to install openelec on. If you are familiar with the 1st gen apple tv&#8217;s then you know about the heat they give off during normal use. Since I don&#8217;t store any media locally on the ATV, (stream from NAS) I have decided to try out a SSD setup.</p>

<p>I ordered a 44pin ide (2.5 hdd) to compact flash adapter along with a 4gb compact flash card. The adapter is nice because it has mounting holes in the same place as the 2.5in hdd. This will allow me to mount the the adapter in the same fashion as the original hard drive. I will post with some pictures and results on both heat and speed when I get it setup.</p>
]]></content>
  </entry>
  
  <entry>
    <title type="html"><![CDATA[Openelec on ATV progress]]></title>
    <link href="http://www.unstdio.org/blog/2010/11/13/openelec-on-atv-progress/"/>
    <updated>2010-11-13T00:14:38-08:00</updated>
    <id>http://www.unstdio.org/blog/2010/11/13/openelec-on-atv-progress</id>
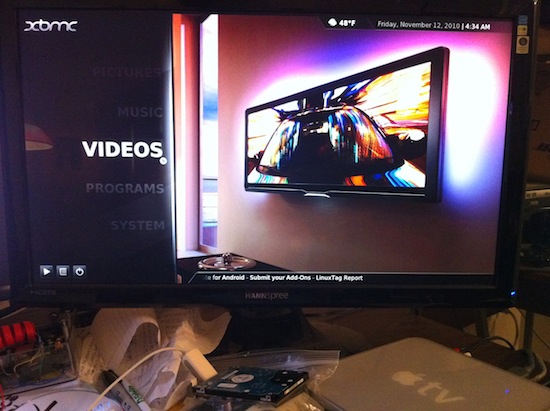
    <content type="html"><![CDATA[<p><a href="http://unstdio.org/images/2010/11/openelectv.jpg"><img src="http://unstdio.org/images/2010/11/openelectv.jpg" alt="" /></a></p>

<p>The last couple days I have been messing around with installing OpenELEC on the Apple TV. I have posted a rough how-to <a href="http://unstdio.org/openelec-on-atv/">here</a>. This is still in early stages and there are some things that don&#8217;t work but I am pretty excited about the progress.</p>

<p>There should be some more development for the ATV platform sometime soon. I am going to possibly start working on a script to install OpenELEC to the internal HDD off of the patchstick. Hopefully I have time this weekend.</p>

<p>Here is a pic of OpenELEC running on the ATV. (Although you can&#8217;t really tell since its just XMBC)</p>

<p><a href="http://unstdio.org/images/2010/11/IMG_12161.jpg"><img src="http://unstdio.org/images/2010/11/IMG_12161.jpg" alt="" /></a></p>
]]></content>
  </entry>
  
  <entry>
    <title type="html"><![CDATA[Arduino LCD over Ethernet (Cat5/6)]]></title>
    <link href="http://www.unstdio.org/blog/2010/11/09/arduino-lcd-over-ethernet-cat56/"/>
    <updated>2010-11-09T18:51:35-08:00</updated>
    <id>http://www.unstdio.org/blog/2010/11/09/arduino-lcd-over-ethernet-cat56</id>
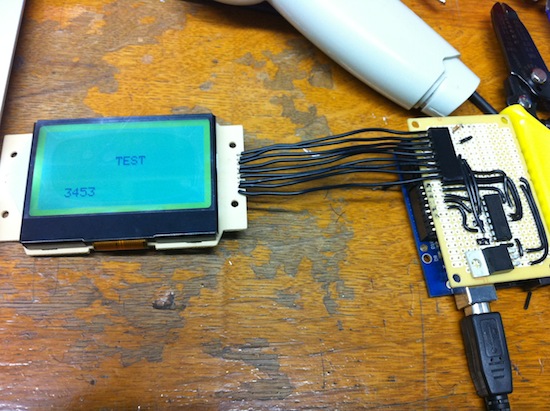
    <content type="html"><![CDATA[<p>I was looking at some pictures of the Makerbot the other day and thought it was cool how they used Ethernet cable for connecting some of the boards together. I was also trying to find something useful to do with these LCD’s I had lying around. Then I came up with the idea of driving the LCD over Ethernet cable.</p>

<p>First, I knew that the ST7565 LCD that I was using is a serial LCD, which means I only need 4 or 5 digital pins to drive the LCD. There are 9 total pins total on the LCD including the backlight. Since there is a backlight GND (LED cathode) and a GND to run the display, I really only 8 connections. This is the number of connections in an Ethernet cable.</p>

<p>The pinout for the LCD is:</p>

<ol>
<li>/CS - Chip Select</li>
<li>/RST - Reset</li>
<li>A0 - sometimes called RS</li>
<li>SCLK - Serial clock</li>
<li>SID - Serial Input Data</li>
<li>VDD - 3.3V power</li>
<li>GND - ground</li>
<li>K - LED cathode</li>
<li>A - LED anode</li>
</ol>


<h3>Making the shield.</h3>

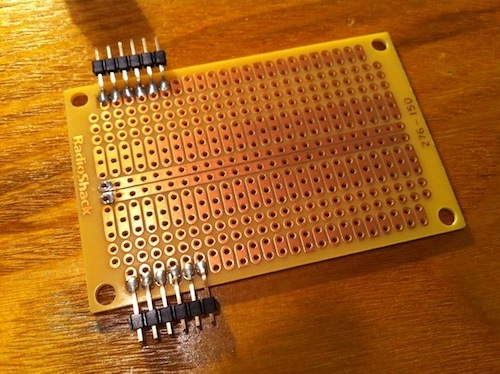
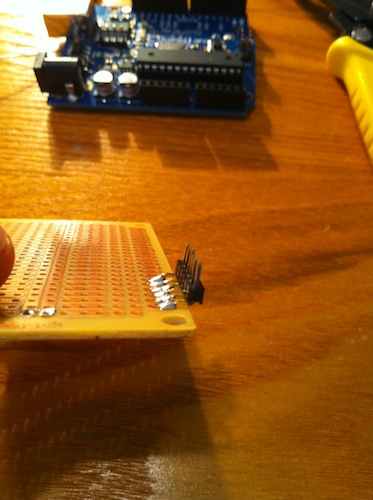
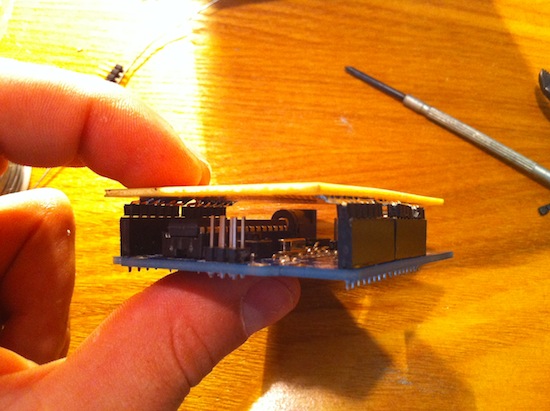
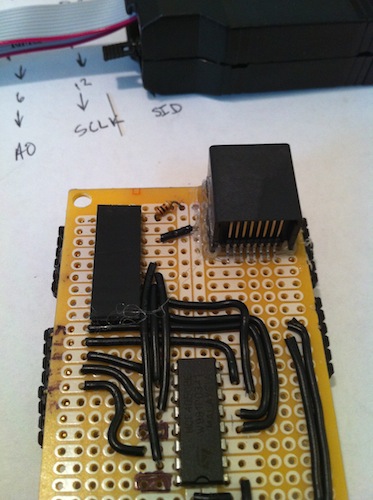
<p>I wanted everything to fit on an arduino shield and not sit on a breadboard. Looking back I should have just bought a prototype shield because it would have been way easier. Since I had a basic <a href="http://rsk.imageg.net/graphics/product_images/pRS1C-2265164w345.jpg">RadioShack PCB</a> which is a bit smaller than the arduino but roughly the same size, I decided to use it for the shield. I would not suggest using this for arduino shields. The board is not wide enough.   In order to make it fit I needed to bend the male pin headers 90 degrees and then 90 degrees the other way. There are some pictures below that show what I did.</p>

<p><a href="http://unstdio.org/images/2010/11/IMG_1166.jpg"><img src="http://unstdio.org/images/2010/11/IMG_1166.jpg" alt="" /></a>
<a href="http://unstdio.org/images/2010/11/IMG_1169.jpg"><img src="http://unstdio.org/images/2010/11/IMG_1169.jpg" alt="" /></a>
<a href="http://unstdio.org/images/2010/11/IMG_1171.jpg"><img src="http://unstdio.org/images/2010/11/IMG_1171.jpg" alt="" /></a></p>

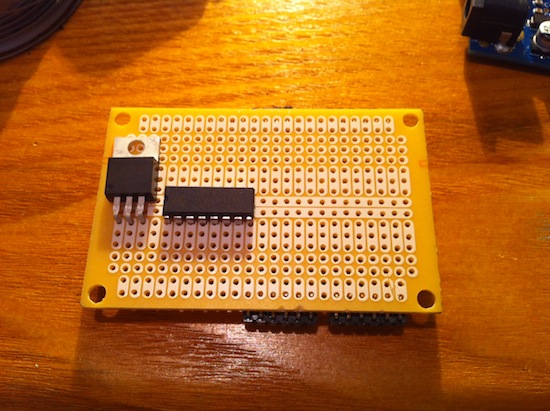
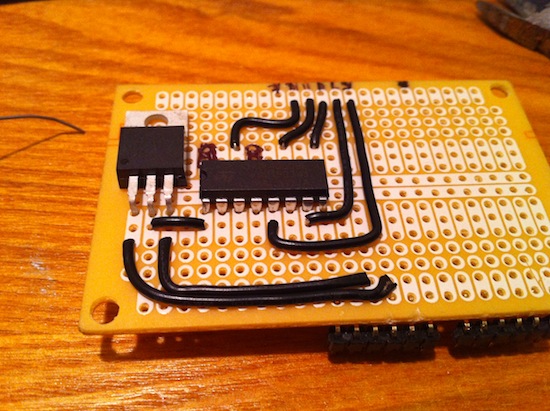
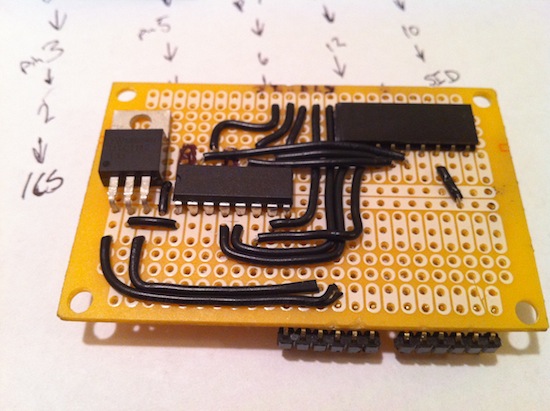
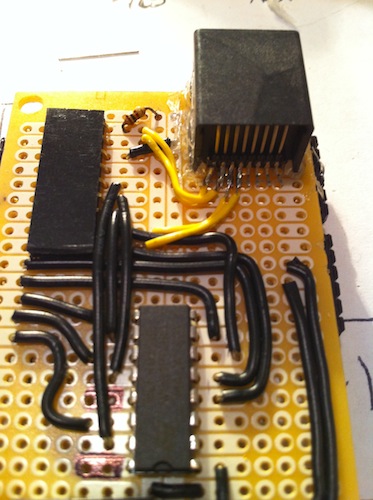
<p>After I had the pins in place, I needed to figure out what I was going to put on the shield. I wanted to be able to use this with arduino clones that may not have the 3.3v output available. I used a LM1117 voltage regulator to drop the voltage to 3.3v. I also needed a 4050 chip that would drop the voltage down from 5v to 3v on the digital pins. The LCD runs on 3.3v so the voltage needs to be dropped down from the arduino. There is also a 100ohm resistor for the backlight. Also wanted to be able to bypass and not use the Ethernet cable if I wanted to so I added some female headers to connect the LCD directly.</p>

<p><a href="http://unstdio.org/images/2010/11/IMG_1173.jpg"><img src="http://unstdio.org/images/2010/11/IMG_1173.jpg" alt="" /></a>
<a href="http://unstdio.org/images/2010/11/IMG_1174.jpg"><img src="http://unstdio.org/images/2010/11/IMG_1174.jpg" alt="" /></a>
<a href="http://unstdio.org/images/2010/11/IMG_1176.jpg"><img src="http://unstdio.org/images/2010/11/IMG_1176.jpg" alt="" /></a>
<a href="http://unstdio.org/images/2010/11/IMG_1177.jpg"><img src="http://unstdio.org/images/2010/11/IMG_1177.jpg" alt="" /></a>
<a href="http://unstdio.org/images/2010/11/IMG_1178.jpg"><img src="http://unstdio.org/images/2010/11/IMG_1178.jpg" alt="" /></a></p>

<p>Arduino – 4050</p>

<p>D8 – Pin5
D9 – Pin7
D10 – Pin9
D11 – Pin11
D12 – Pin14</p>

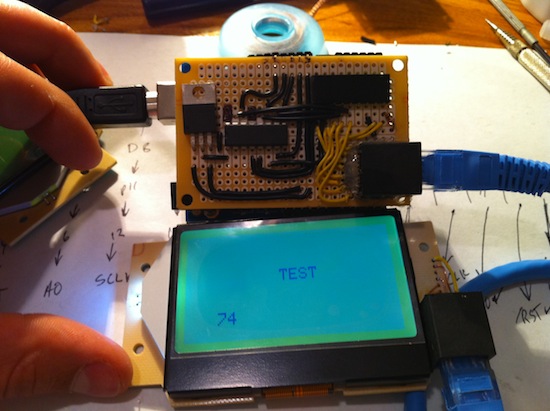
<p>I then took the output pins from the 4050 and connected them to the female header. After hooking up the LCD everything was working.</p>

<p><a href="http://unstdio.org/images/2010/11/IMG_1184.jpg"><img src="http://unstdio.org/images/2010/11/IMG_1184.jpg" alt="" /></a></p>

<h3>Adding the Ethernet jacks.</h3>

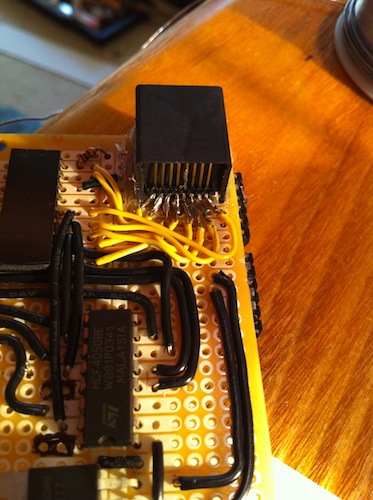
<p>Now that the shield was working I needed to add the Ethernet jacks to the board and the LCD. I picked <a href="http://www.mouser.com/ProductDetail/Molex/44144-0003/?qs=ZZBj1wiNDbm2RKLIUrrGPA%3d%3d">some of these</a> up from mouser. These have the pins tailed out of the back, which is what I needed to be able to solder to them. I ended up hot gluing the jack to the shield. There was really no other way to keep it on the board. After the jack was on, I solder all the connections to the Ethernet leads. This is not for the faint of heart. There were a few times I bridged the pins and it took forever to get them desoldered. I would not attempt this unless you have a nice small soldering tip.</p>

<p><a href="http://unstdio.org/images/2010/11/IMG_1185.jpg"><img src="http://unstdio.org/images/2010/11/IMG_1185.jpg" alt="" /></a>
<a href="http://unstdio.org/images/2010/11/IMG_1186.jpg"><img src="http://unstdio.org/images/2010/11/IMG_1186.jpg" alt="" /></a>
<a href="http://unstdio.org/images/2010/11/IMG_1187.jpg"><img src="http://unstdio.org/images/2010/11/IMG_1187.jpg" alt="" /></a></p>

<p>I tested all the connections to make sure they were all good. After that I put a layer of hot glue down to keep them from moving and possibly bridging.</p>

<p>Here is the pins I used for connecting them to Ethernet. (568-B Cable)</p>

<p>Ethernet  - LCD</p>

<p>Orange/White – SID
Orange – SCLK
Green/White – A0
Blue - /RST
Blue/White - /CS
Green – 3.3v
Brown/White – GND
Brown – Backlight</p>

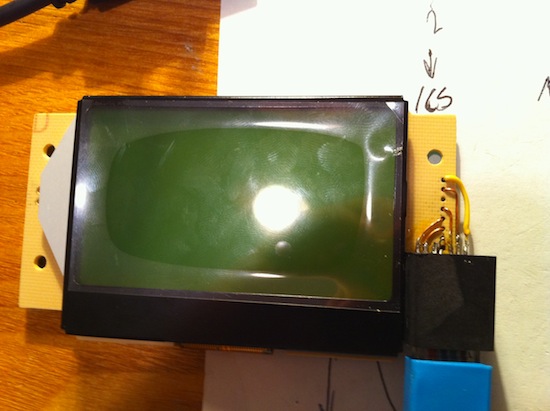
<p><a href="http://unstdio.org/images/2010/11/IMG_1189.jpg"><img src="http://unstdio.org/images/2010/11/IMG_1189.jpg" alt="" /></a></p>

<p>I picked these pins because of how I was able to place the Ethernet jack on the LCD. The /CS pin which was the 4 in from the right, when bent down, fit directly in the hole for the LCD. The rest followed suite when picking placement. This was also a PITA to solder and took some time. After getting those all soldered in and testing the connections, I hot glued the connections like I did on the shield. After plugging it in, everything worked.</p>

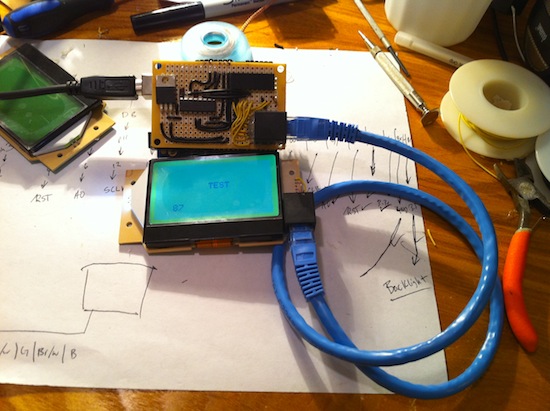
<p><a href="http://unstdio.org/images/2010/11/IMG_1193.jpg"><img src="http://unstdio.org/images/2010/11/IMG_1193.jpg" alt="" /></a></p>

<p><a href="http://unstdio.org/images/2010/11/IMG_1195.jpg"><img src="http://unstdio.org/images/2010/11/IMG_1195.jpg" alt="" /></a></p>

<p>Thanks to ladyada for providing awesome documentation on her projects.</p>
]]></content>
  </entry>
  
  <entry>
    <title type="html"><![CDATA[PWN your coffee shop]]></title>
    <link href="http://www.unstdio.org/blog/2010/10/28/pwn-your-coffee-shop/"/>
    <updated>2010-10-28T14:20:43-07:00</updated>
    <id>http://www.unstdio.org/blog/2010/10/28/pwn-your-coffee-shop</id>
    <content type="html"><![CDATA[<p>I had meant to write about this a couple days ago but just have been pretty busy. At Toorcon 12 I mentioned that the last talk I saw was about session hijacking (sidejacking) and they (Eric Butler and Ian Gallagher) released a pretty nifty tool that makes it really easy to steal a users session while on the same wifi AP. I downloaded it when I was at the airport and was the 14th person to download it. After checking this morning it has 373,535 downloads. That’s amazing and kind of frightening since I know what this tool can do.</p>

<p>So the theory isn’t that new, it’s been a problem for quite a while. I actually remember talking about this at a coffee shop with a friend while still in college.  When accessing most popular sites that require logins you receive a HTTP session cookie from the server once you authenticate.  The vulnerability is not about getting a users password and user name, because most times those are done using SSL and you aren’t able to sniff that data. The vulnerability comes into play when you move from a https page to a http page. (ie login page to regular non-encrypted page) When you log into a page and successfully authenticate, you are issued (or start) a session id(cookie) by the server. That id is used by the site to recognize you as the user you logged in as. It displays certain preferences and adds functionality when you are logged in to that site. If you can somehow steal that id(cookie) lets say over wifi or something, since everything is broadcast to everyone on that access point, you would then become that person to the website. So for example, if I was sniffing wireless traffic and was able to obtain someone’s facebook session and used that session id to go back to facebook, I would then see their account and would be logged in as that user.</p>

<h3>So if that’s not a new vulnerability then why has it been so popular in the last few days?</h3>

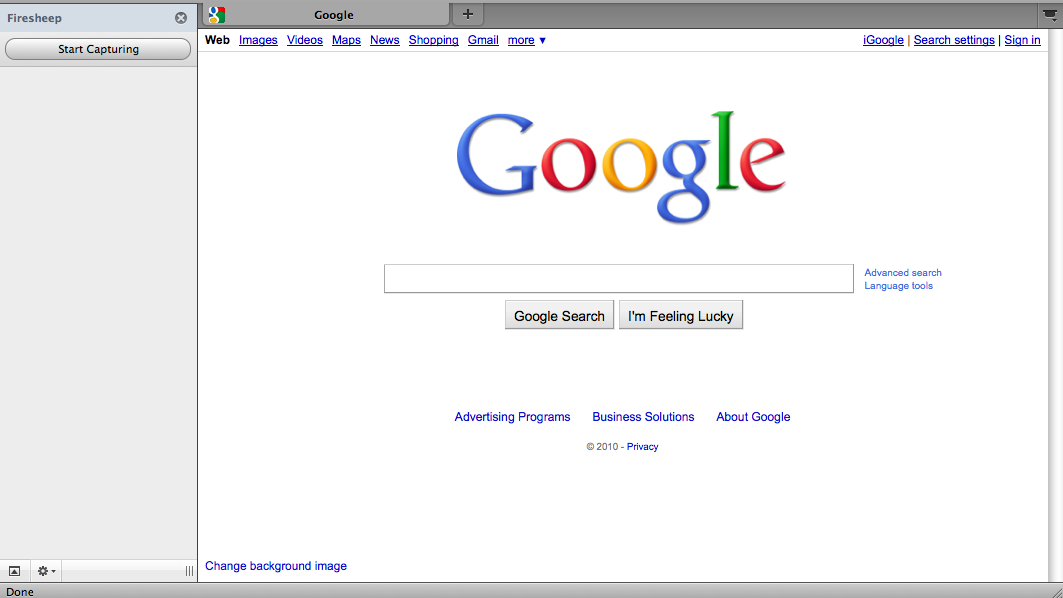
<p>Firesheep. It’s a program that makes it super easy to do what I just described above automatically. No programming, or learning how to use packet tools, or loading cookies into your browser. I literally installed this firefox extension in less than 5 minutes. (Including DL time) The hardest part was trying to find out how to display the side bar.</p>

<h3>So, like, how do I use this tool?</h3>

<p>First, lets start with downloading the firefox extension. I’m using OS X but I’m pretty sure you can use Windows too but you have to install winpcap.  You can download it <a href="http://github.com/codebutler/firesheep/">here</a>. Once you have it you can either open it with firefox or click on it and choose firefox as the application.  <em>Note:</em> I had an older version of FF and I had to update my version before being able to install the extension. Once it’s installed, you can choose Tools -> Add-ons  then find the Extensions tab. You should now see Firesheep 0.1 installed. Click preferences and check the Capture option to make sure that it’s pointed to your wireless device. (en0 for me) Websites is where you add new websites to the list of sites that you know how the session cookie is stored.  Advanced is what type of traffic you would like to filer, default is TCP traffic on port 80.  Once everything is setup you can then enable it by going to View -> Sidebar and then choosing Firesheep.  You will then get a sidebar on the left hand side with a button that says start capturing. Once you start capturing people’s data and hijacking their sessions you are probably breaking one law or another depending on where you are. What you do at this point is up to you.</p>

<p><a href="http://unstdio.org/images/2010/10/Screen-shot-2010-10-28-at-6.56.50-AM.png"><img src="http://unstdio.org/images/2010/10/Screen-shot-2010-10-28-at-6.56.50-AM.png" alt="" /></a></p>

<h3>Can I protect against this?</h3>

<p>Kinda. You can do a few things like VPN, tunnel http over ssh to a location that you know is legit, use ssl on the site if they have/allow it, or don’t access any of those sites while on public wifi. Those will definitely work but are not really convenient. I think the point of this tool was to make it so widespread for anyone to run this type of attack that it would force sites to use ssl for everything. So go complain to vulnerable sites that they need to improve their security.</p>
]]></content>
  </entry>
  
  <entry>
    <title type="html"><![CDATA[Back from Toorcon12]]></title>
    <link href="http://www.unstdio.org/blog/2010/10/26/back-from-toorcon12/"/>
    <updated>2010-10-26T14:35:50-07:00</updated>
    <id>http://www.unstdio.org/blog/2010/10/26/back-from-toorcon12</id>
    <content type="html"><![CDATA[<p>I’m finally back from Toorcon after some flight delays. I had a good time. Met some cool people and saw some good talks. One worth mentioning was Dan Kaminsky’s talk on DNSSEC. He brought up some good points on how DNSSEC could be the “answer” we have been searching for, for secure email. (and other things) Another awesome talk was about Session Hijacking. Although this isn’t a new topic, Eric Butler and Ian Gallagher did release a pretty badass tool called <a href="http://codebutler.github.com/firesheep/">firesheep</a>, which I will be talking about in my next post.</p>

<p><a href="http://unstdio.org/images/2010/10/IMG_1116.jpg"><img src="http://unstdio.org/images/2010/10/IMG_1116.jpg" alt="" /></a></p>

<h3>The Badge</h3>

<p>Before Toorcon I was under the impression that the badge would be an electronic badge by the guys who made the Defcon Ninja Badge this year. (cstone and woz) After emailing them a couple days before, I was informed that due to some time constraints it wasn’t going to happen.  They might possibly use it for another con in the future.</p>

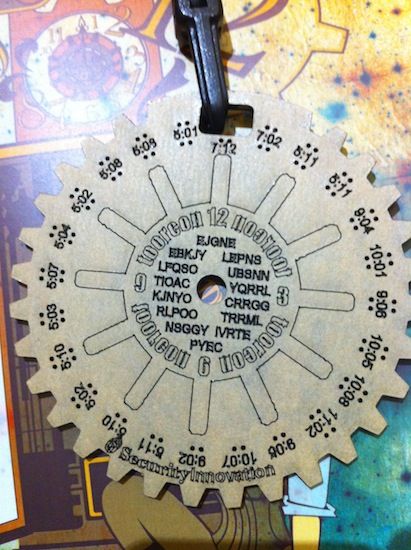
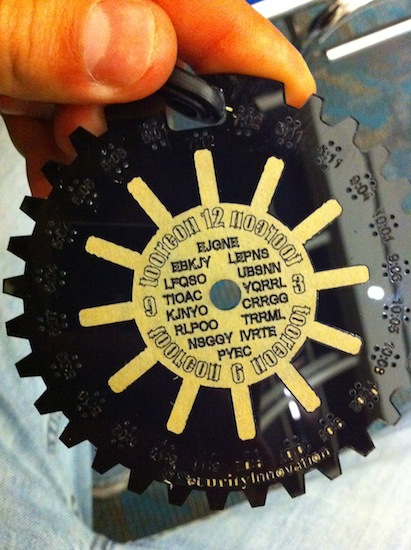
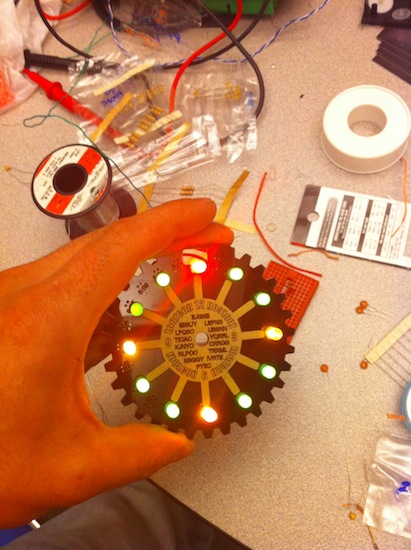
<p>The actual badge was some laser cut acrylic (possibly from metrix?) in different colors for various types of attendees. They were shaped in the Toorcon gear logo.</p>

<p><a href="http://unstdio.org/images/2010/10/IMG_1070.jpg"><img src="http://unstdio.org/images/2010/10/IMG_1070.jpg" alt="" /></a></p>

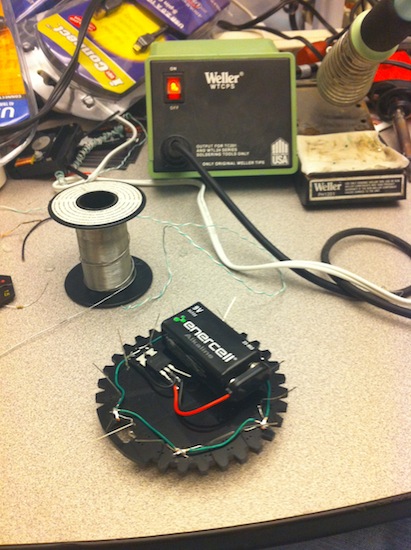
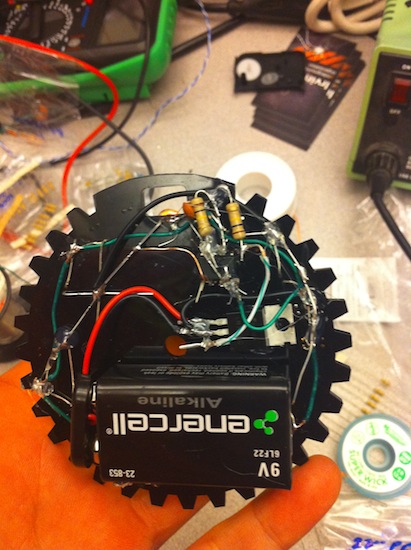
<p>They announced they would have a badge hacking contest and provided some parts to solder up cool stuff to the badge. I apparently didn’t get the memo they would be providing free (as in beer) stuff to do some hardware hacking on the badge. So I took a trip on the bus to the closest radio shack and bought some LEDs and stuff.</p>

<p>I really wanted to find/buy an ATmega (168 or 328) to put on the badge but I couldn’t get a hold of one.  By that time I had already put in the LEDs, 9v bat, and LM7805 voltage reg. So I looked around the table and found an NE555 timer chip. My theory was to blink the LEDs on off in a sequence.  After spending a ton of time trying to wire the thing up with the proper resistors and capacitor I ended up giving up and just wiring them up. Either the chip was bad or I messed up on the resistors/capacitor and the timing was just really fast so it looked like it was constantly on.  Here are a few pics:</p>

<p><a href="http://unstdio.org/images/2010/10/IMG_1071.jpg"><img src="http://unstdio.org/images/2010/10/IMG_1071.jpg" alt="" /></a></p>

<p><a href="http://unstdio.org/images/2010/10/IMG_1097.jpg"><img src="http://unstdio.org/images/2010/10/IMG_1097.jpg" alt="" /></a></p>

<p><a href="http://unstdio.org/images/2010/10/IMG_1101.jpg"><img src="http://unstdio.org/images/2010/10/IMG_1101.jpg" alt="" /></a></p>

<p><a href="http://unstdio.org/images/2010/10/IMG_1100.jpg"><img src="http://unstdio.org/images/2010/10/IMG_1100.jpg" alt="" /></a></p>

<p>I had to leave a bit early to catch a flight home, so I didn’t get to a few talks I would have liked to see. (woz’s “Hardware will cut you.” And Joel’s “LANrev&#8217;s Multiple Vulnerabilities Come to Light”)</p>

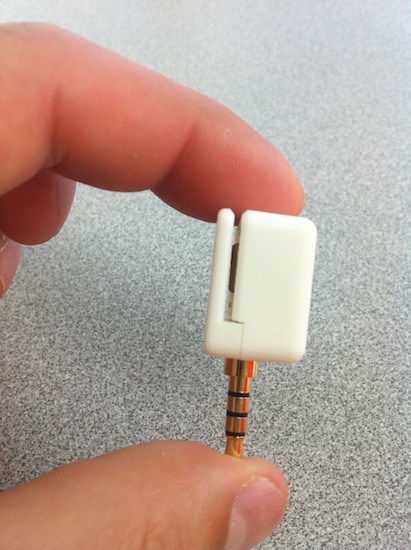
<p>Oh, I did meet someone from “Square” which makes software (and a small device) for doing credit card transaction on your iPhone or iPad. He ended up giving me one.</p>

<p><a href="http://unstdio.org/images/2010/10/IMG_1118.jpg"><img src="http://unstdio.org/images/2010/10/IMG_1118.jpg" alt="" /></a></p>

<p>I might trying playing with this a little bit when I have some spare time.</p>
]]></content>
  </entry>
  
  <entry>
    <title type="html"><![CDATA[Spoof your mac on your mac.]]></title>
    <link href="http://www.unstdio.org/blog/2010/10/22/spoof-your-mac-on-your-mac/"/>
    <updated>2010-10-22T17:21:19-07:00</updated>
    <id>http://www.unstdio.org/blog/2010/10/22/spoof-your-mac-on-your-mac</id>
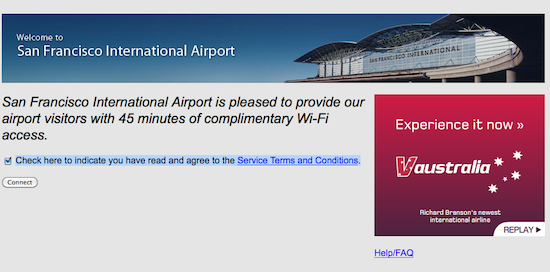
    <content type="html"><![CDATA[<p>I&#8217;m on my way to San Diego for Toorcon 12 and I have a lay over in San Fran. As I jump onto the free wifi (provided by t-mobile) I&#8217;m greeted by a nice page with a &#8221;<em>Check here to indicate you have read and agree to the Service Terms and Conditions.</em>&#8221; and a limit on the free wifi time you get, &#8221;<em>San Francisco International Airport is pleased to provide our airport visitors with 45 minutes of complimentary Wi-Fi access.</em>&#8221; only 45 min? That&#8217;s kind of a bummer. I&#8217;m guessing it&#8217;s based on the MAC address of the device. Let&#8217;s see if we can get a little bit more time out of the free wifi.</p>

<p>I&#8217;m running 10.6 so this this might change for other versions. First we need to find our current mac address.</p>

<pre><code>ifconfig en0 | grep ether
</code></pre>

<p>This finds the current address of your network card. You might need to change to en1 or whatever for your specific setup. If you want to save your original mac address run:</p>

<pre><code>ifconfig en0 | grep ether &gt; mac.orig
</code></pre>

<p>This stores your original mac in a file call mac.orig. Next you need to disassociate your wlan card with any networks you are associated. run this as root or add sudo to the beginning of the command.</p>

<pre><code>/System/Library/PrivateFrameworks/Apple80211.framework
/Versions/Current/Resources/airport -z
</code></pre>

<p>Now lets change your mac to whatever you want. You might just want to change the last two characters of you mac to make it easier. run (as root):</p>

<pre><code>ifconfig en0 ether 00:1f:5b:d7:f4:a3
</code></pre>

<p>You can run that or you can modify that if you want. Now do another ifconfig en0 to make sure your mac is changed and rejoin the the wifi network.</p>

<p><a href="http://unstdio.org/images/2010/10/Screen-shot-2010-10-22-at-10.18.12-AM.png"><img src="http://unstdio.org/images/2010/10/Screen-shot-2010-10-22-at-10.18.12-AM.png" alt="" /></a></p>

<p>You will need to accept the terms of service, but you will be online for another 45 min. Rinse, Repeat, and Ruse.</p>
]]></content>
  </entry>
  
  <entry>
    <title type="html"><![CDATA[Apple TV and openelec.tv]]></title>
    <link href="http://www.unstdio.org/blog/2010/10/22/apple-tv-and-openelec-tv/"/>
    <updated>2010-10-22T16:49:30-07:00</updated>
    <id>http://www.unstdio.org/blog/2010/10/22/apple-tv-and-openelec-tv</id>
    <content type="html"><![CDATA[<p>I mentioned in my last post about trying to find and ultra cheap streaming media box. I did some research and found that most of the devices that I looked at (that would be good for this type of application) were a bit too expensive for my taste. I like cheap solid solutions.</p>

<p>I have been running XBMC on Apple TV for a couple of years now and really like it. However,  recently it&#8217;s become a bit slow and sluggish when keeping up to date with the newest versions and releases. I planned on putting together a custom distro so that it didn&#8217;t have the bloatware of the ATV OS running underneath the XBMC since I never use it. I came up with an analogy to explain the dilemma to my GF.</p>

<blockquote><p>Imagine you have a t-shirt (XBMC) and you like to wear that t-shirt all the time. But in order to wear you t-shirt you have to first put on a sweat shirt (ATV OS). So every time you just want to wear the t-shirt you need a sweat shirt on under it, vs just being able to put the t-shirt on directly.</p></blockquote>

<p>After doing some searching on a lightweight distro, I found that there was already a project with the same goals, Openelec.tv. Open Embedded Linux Entertainment Center is a distro that is aimed at using a minimal linux install to boot directly into XBMC. They have options for installing it to a flash USB drive, compact flash, or directly to your HDD. It also has an ssh server (from what I read) to enable remote access and configuration.</p>

<p>Apparently the current generic imaged worked right out of the box with the ATV (minus some IR and wlan/lan drivers) using the atv-bootloader. They are now going to release an image for the ATV with all the drivers included. The release was scheduled for (10/15) but was pushed back to possibly today (10/22). It has not been released yet on their site but I suspect it will be up there soon. (within the next few days) According to some of the people beta testing it, it boots really fast. They also mentioned that it works really well and is also expected to include for support for CrystalHD. For anyone who doesn&#8217;t know, CrystalHD is a card that is installed in the ATV (replaces the WLAN card) to provide HD support for the Apple TV. You can find more info <a href="http://xbmc.org/davilla/2009/12/29/broadcom-crystal-hd-its-magic/">here</a>. I like and use the wireless N all the time, and most of my content isn&#8217;t HD so I won&#8217;t be using that option on my setup.</p>

<p>I will be doing a writeup of installing and configuring this new distro when it&#8217;s released for the ATV. I may also buy a few more ATVs to install and sell them for people who want the application but don&#8217;t want to go through the work of setting it up.</p>

<p>Now, on my way to toorcon&#8230;</p>
]]></content>
  </entry>
  
  <entry>
    <title type="html"><![CDATA[Toorcon 12, PHP, and blah]]></title>
    <link href="http://www.unstdio.org/blog/2010/10/21/toorcon-12-php-and-blah/"/>
    <updated>2010-10-21T13:39:34-07:00</updated>
    <id>http://www.unstdio.org/blog/2010/10/21/toorcon-12-php-and-blah</id>
    <content type="html"><![CDATA[<p><a href="http://sandiego.toorcon.org/"><img src="http://toorcon.org/i/tclogo.jpg" alt="" /></a></p>

<p>I will be going to Toorcon 12 tomorrow. I have never been to a San Diego or Toorcon, so this will be a first. It looks to be a pretty good <a href="http://sandiego.toorcon.org/index.php?option=com_content&amp;task=section&amp;id=3&amp;Itemid=9">line up</a> of talks this year. In order to get back on Sunday I have to leave a bit early so I won&#8217;t be able to catch all the talks on Sunday.</p>

<p>I was also asked this week to write a few PHP functions. And while I didn&#8217;t do so hot on the spot, I did find a good way to accomplish the task. The question was: write a function to return true or false (or print) if two elements in a given array SUM to be 100. The first function is really slow, but more of an answer if all else fails type of approach.</p>

<pre><code>$RandomArray = Array(74,122,103,125,80,29,127,123,35,33,142,91,
95,36,12,57,115,103,15,58,150,133,73,143,96,48,81,18,63,10,134,
30,30,28,88,25,30,84,40,27,102,136,32,93,115,132,55,142,68,60,
128,30,128,31,115,28,93,24,2,53,98,23,129,145,3,114,36,108,63,
60,70,97,66,26,28,64,62,96,104,114,5,7,121,4,145,62,38,115,112,
128,92,142,45,136,2,6,47,9,25);
$RequestedNum = 100;

function Search1($RandomArray, $RNum){
 while($count &lt; count($RandomArray)){
  $count = 0;
  foreach($RandomArray as $Num){
   if($RandomArray[$count]+$Num == $RNum){
    echo $RandomArray[$count] . " + " . $Num . " = " . $RNum . " : True";
    break 2;
   }
  }
 $count++;
 }
 if(count &gt; count($RandomArray)){
  echo "No match found :  False";
 }
}
</code></pre>

<p>The second one is a bit quicker and uses the built in function in_array();</p>

<pre><code>function Search2($RandomArray, $RNum){
 asort($RandomArray);
 $SortedArray = $RandomArray;
 foreach($SortedArray as $SA){
  $findNum = $RNum - $SA;
  $Success = in_array($findNum, $SortedArray);
  if($Success == True){
   echo $SA .  " + " . $findNum . " = " . $RNum . " : True";
   break;
  }
 }
 if($Success == False){
  echo "No match found :  False";
 }
}
</code></pre>

<p>I&#8217;ve been playing around with the idea of an ultra cheap (sub $100) HTPC with XBMC running on it. Most boxes that would be suited for this are > $100. I&#8217;m looking around at some devices that might be able to run as a cheap media streaming box for those extra TVs you might have sitting around in your room/basement. Most of my focus has been towards Nettops and Thin Clients. I also found a cool project of someone in England porting it to a <a href="http://elinux.org/BeagleBoard/GSoC/2010_Projects/XBMC">beagleboard</a>.</p>

<p>This makes me want to get one and continue or contribute to his work.</p>
]]></content>
  </entry>
  
</feed>